Camera: Canon EOS40D
Lens: Canon 17-85mm EF USM Kit lens
Apps used:
Photoforge2 - to create a high pass layer.
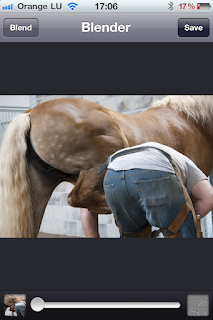
Blender - to blend the high pass layer with the normal layer, slider at 100%, blending mode "Overlay". This method neatly sharpens the whole picture without adding noise. Look at the details on the jeans of the blacksmith! Zoom in and you can even see it's structure.
PhotoForge2 again - after sharpening the photo by blending the high pass layer with the normal layer I reimported the sharpened layer into PhotoForge to apply a Lomo filter as well as to add a white frame.
A+Signature - to add my copyright watermark
Some apps include the option to sharpen a picture but no matter what app I tried I realized that even the best apps end up with a lot of noise after sharpening, no matter if you are using PS Express, FilterStorm3, Iris or whatever. For that reason I applied sharpening filters only modestly. But I always wished to have the possibility to use the same procedure for smart-sharpening that I use in PhotoShop CS5 where I create a copy of my original layer, then apply a high pass filter to that layer, go to the layer's blending options and choose "Overlay" from the menu - et voilà the picture is crystal clear and sharp. On the slider one can adjust the amount of sharpening. Sometimes 100% is a bit too much so you need to adjust a lower setting.
Ok, that's for PS on the big screen. Now I finally found a way to do the same thing on the iPhone, which will also work on the iPad. Currently PhotoForge2 seems to be the only app that comes with a high pass filter (as far as I know, but I may be wrong indeed since I don't know all the apps). I apply that filter to my original picture and save it as a new picture (=layer). Don't worry if your screen turns all gay after applying the filter cause you need to move the slider to the right to see an effect. I used a value of about 200. You don't need to adjust it to exactly 200.00 which is quite impossible. Just use any value close to 200.
After saving that picture I opened Blender where I added the original picture plus the high pass picture for blending. Settings: Blending mode "Overlay", Slider to 100%, original picture on the left, high pass picture on the right. Please see the screenshots below. Do you see the difference? The first picture is unsharpened, the second picture is sharpened:
After saving that picture I opened Blender where I added the original picture plus the high pass picture for blending. Settings: Blending mode "Overlay", Slider to 100%, original picture on the left, high pass picture on the right. Please see the screenshots below. Do you see the difference? The first picture is unsharpened, the second picture is sharpened:
I applied the same editing procedures to a set of six photos I made one day in June of 2009 as the blacksmith was at the stables to give my daughter's horse Billie a manicure. I asked him for his permission to make photos while he works and he agreed. Billie is a very gentle horse. She truly enjoys to have her hooves cared for - well, but that's part of the female character, isn't it ;o)?
The apps that I used on this set are all top notch apps on the long list of photo editing apps, not just because of the possibilities they provide to create beautiful pictures but also because all of them don't ruin the original photo resolution on saving. I processed all of the above photos in original resolution of 3888x2592px. The iPhone needed some time for processing but this wasn't much more than it needs to process original iPhone pictures. I tested this on a Hipstamatic photo that I also sharpened. See below:
~~~~~~~~~~~~~~~~~~~~~~~~~~~~~~~~~~~~~~


This is a wonderful tip! I use a high-pass on most of my photos and was looking for a way to do it on the go. I'm glad you mentioned this, thank you.
ReplyDelete