Showing posts with label railroad. Show all posts

Wednesday, August 29, 2012

Doing HDRs with the 645pro (beta)


Camera App: 645pro beta

Other Apps used for post processing:
Mobile HDR - to create a HDR picture from 3 files. Most iOS HDR apps use only 2 files, one overexposed and one underexposed. Mobile HDR aims at creating HDR pictures from your bracket shots made with a DSLR. Because the 645pro currently offers the best picture quality available on the iPhone I wanted to see if Mobile HDR can be useful for photos made with the iPhone too. The answer is YES it can! But to create the files necessary for the HDR picture one must use some tricks because the 645pro offers no bracket mode shooting. So I did the following:
1) I used the 645pro film with the richest colors, which is the FC5 film.
2) I used the Neutral Density #1 filter with 100% efficiency. Currently that filter is only available in the actual beta version of the 645pro but that version is to be released soon. It runs rock stable and comes with a lot of improvements. So if you don't already have the 645pro on your iPhone I recommend you buying it. It's definitely the best camera app available, and it's a pleasure to work with it. 
The 645pro saves your photos in TIFF format as well as in JPG formt. The TIFFs are the RAW files, unprocessed, no film effects, no filters. Development of RAW photos shot with a DSLR is usually done in a so called "RAW converter" but no such app exists for the iOS devices so development is done in the 645pro itself, that's why it's called a dRAW file - a developed RAW file. The JPG file (of the same photo) is the photo with the configured effects applied, such as films and filters used.
3) In case of the old Diesel engine (above) I also created a black and white version in MonoPhix HD as well as an overexposed version in Laminar.
4) To create the HDR picture in Mobile HDR I used the black and white version created in MonoPhix HD, the JPG version from 645pro and the overexposed version made in Laminar. To create the overexposed picture I simply adjusted its curve by pulling it a bit outwards on a spot set in the middle of the line.

Here you see the original photos and the finished HDR picture

Screenshot from Laminar showing the adjusted curve 
to create an overexposed photo.


The black and white picture created from the TIFF file
using MonoPhix HD.


After importing the files into Mobile HDR the processing
 screen looked like this.


Here's yet another HDR picture created in a similar way than the picture on top of the page. In this case I created an underexposed version of the TIFF file to use with the set of 3 photos in Mobile HDR. Then I created a black and white version from the HDR picture in MonoPhix HD. I also tried Snapseed but I liked the result from MonoPhix HD more. Then I was opening the color HDR and the b/w HDR in Blender. The color version on the left side - the b/w version on the right side. Blending mode was "normal", with the slider set 25% to the left. This enhanced the colors and de-saturated the picture a bit at the same time.

As usual, a copyright watermark was added in A+Signature.

If you got questions please feel free to ask. You may also find me on Facebook. Just search for "quaffii" or "Gaston Graf".
~~~~~~~~~~~~~~~~~~~~~~~~~~~~~~~~~~~~~~~~~~~~~~~~~~~~~~~~~~


Monday, December 12, 2011

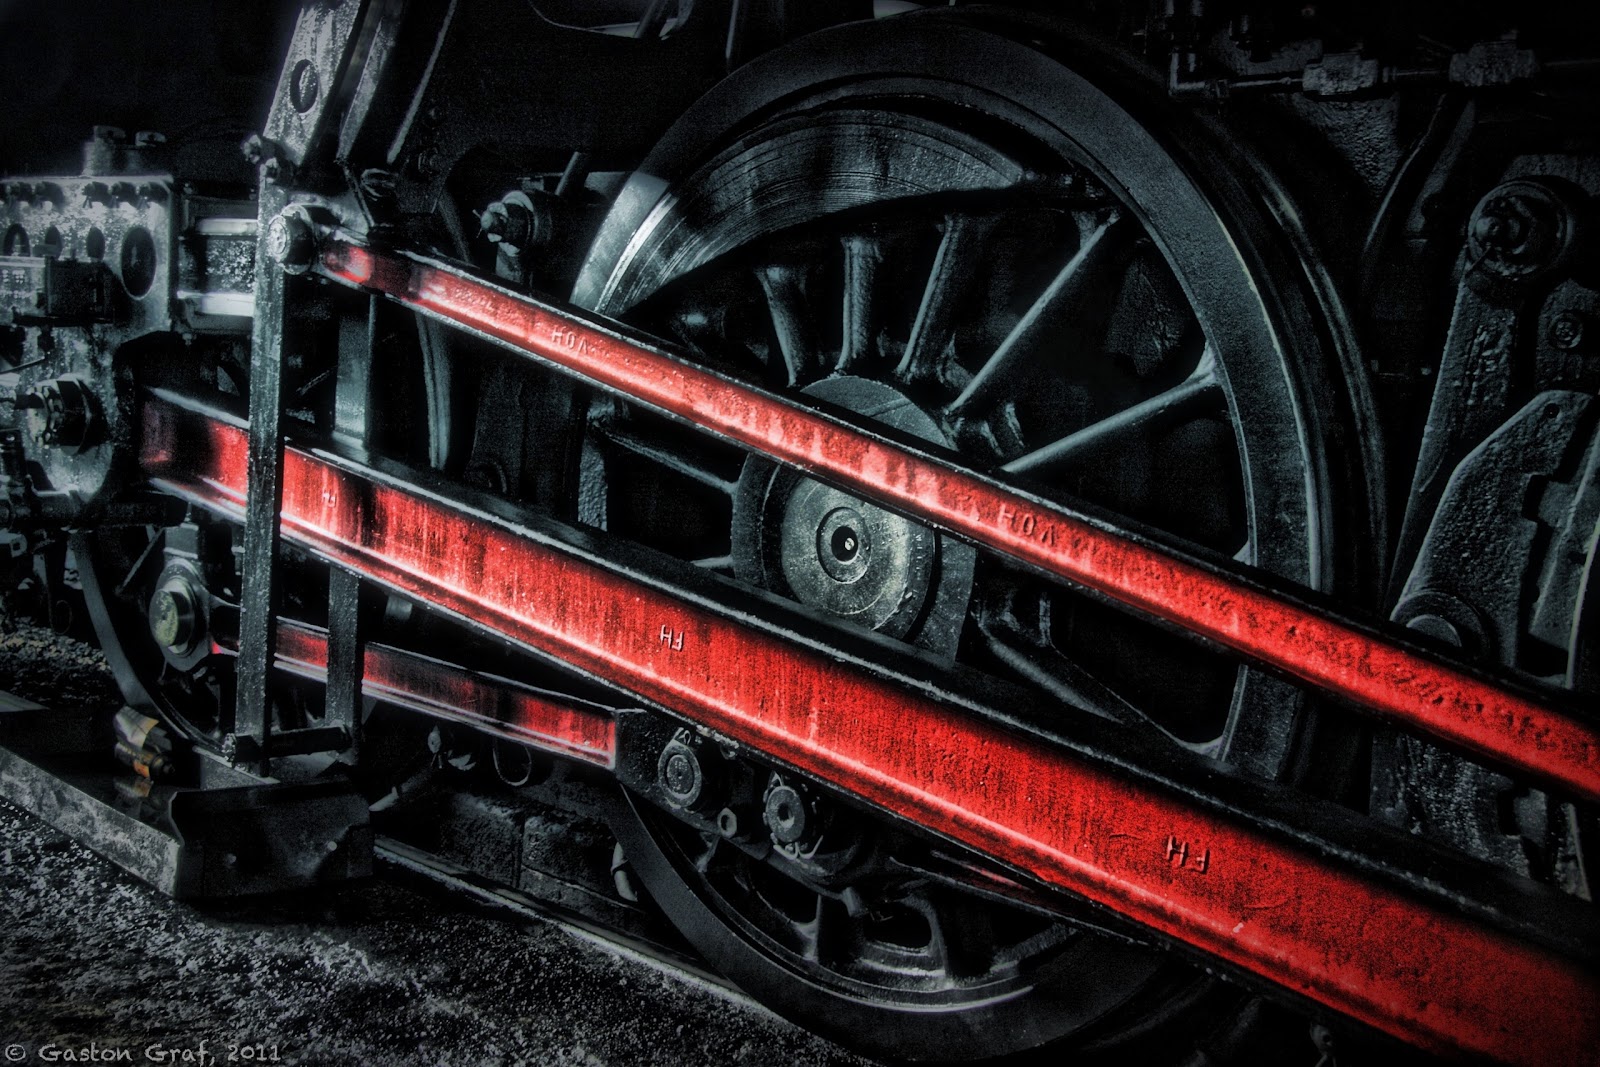
Black Wheel of Power


Camera: Canon EOS40D with 17-85mm EF USM kit lens.


RAW file developed in Canon Digital Photo Professional.
Photo processed on iPad2 with the following apps:
SimplyHDR-HD, Photo fx Ultra, Blender, FilterStorm Pro, Snapseed and TouchRetouch HD. Unfortunately I cannot provide details about every step I took to create this picture because I was playing around with a lot of apps but in the end I wasn't satisfied with the results so I went back to the beginning and restarted from HDR version made with SimplyHDR-HD. I used Photo Fx Ultra + Blender to work out the colors because I wanted to have a deep black wheel. I resized the picture in FilterStorm Pro, added some structure in Snapseed and removed some unwanted white spots with TouchRetouch HD.
A+Signature was used for the copyright watermark, as usual.


This is one of the big power wheels of steam engine 5519, photographed as the engine was in the shed. Railroad friends may find more information at the website of 5519. Unfortunately the website is in German only but you may find photos of the engine in action if you click on the word "Foto" in the top row of the page.

This picture is based on an analog photo I made a few years ago, in 2005 maybe. I happened to just return with the old switcher engine 910 which is visible in the background, as 5519 rumbled onto the turning table.


In World War II, as the Grand-Duchy of Luxembourg had been occupied by the Germans, the Reichsbahn ordered a set of 20 steam engines of the class 42 at the "Wiener Lokomotivfabrik Floridsdorf (WLF)" in Vienna in Austria but the engines couldn't be delivered to the Germans anymore as the war then ended. So the national railroad company SNCFL received these engines by the end of 1948, beginning of 1949, registering them as class 55. Engine # 5519 had been build in 1948 in Vienna Floridsdorf. It's "Fabriknummer" (serial no.) was 17615. Initially, the German Reichsbahn had planned to let it run unter the number 42 2718.
In service of the SNCFL this type was mainly used to haul coal and ore trains. It remained in service until the early 1960s as the costly steam engines got replaced by new class 3600 (electric) and the new classes 1600 and 1800 (diesel).
I still remember 5519 rotting away in the town park of Bettembourg, as I was a boy of 14. But 8 years later some railroad enthusiasts made an incredible effort to restore and save it. Now good old 5519 lives a new life again as a very popular tourist attraction, hauling tourist trains to Germany, France and Belgium.


Btw: if you're interested to have a ride then please contact the operators from their website. You may order tickets over the Internet.


This is the Instagram version of my picture. I really cannot say which version I like most, the original size, or the square size. Decide for yourself:


Questions? Send me an email to (quaffit(at)gmail.com) or leave me a comment ;o)!
Note: Please replace (at) with @ in my email address. This is a simple measure to prevent spam bots from harvesting addresses.


~~~~~~~~~~~~~~~~~~~~~~~~~~~~~~~~~~~~~~~~~~~~~~~~~~~~~~

Thursday, December 1, 2011

The Sun goes down over Luxembourg City Main Station


Camera App: BracketMode

Additional Apps used for post processing:
ProHDR - for a HDR picture that served as the base to do this simulated oil painting.
SimplyHDR - to enhance the first HDR picture further.
Blender - ... and Blender again... I don't remember how often I used Blender on this picture until I received the desired result. I blend the second HDR with the first one, and the results I also blend again and again.
ArtistaOil - for an oil painting of my HDR picture.
MonoPix - for a black & white layer. Blending in a b/w layer in Overlay mode enhances contrast and colors.
Photo fx - for a pencil drawing with strong outlines. I blend that one in to bring back some details in the oil painting which looked nice but a bit too blurred, after my taste.
TouchRetouch - for some touchups. There was a flag on the right edge that was way too close to the edge so I removed it.
PicGrunger - for the canvas effect. I used Burlap for texture, Aged for effect and Block Party for style, but set the slider to full left (zero) because I only wanted the texture.
Camera+ - for a little more Vibrancy. I saved that result, then re-imported it to apply the magic Clarity filter. The result was stunning! The overall picture got much brighter and the details of the darker areas came out nicely. But the picture was too bright now so I went back to Blender again to blend it with the previous version in Normal mode.
I then transferred my results to the PC to check them on the big screen. I discovered the texture coming out a bit too strong so I went back to my iPhone again to blend it with the non Burlap version in Normal mode. The result was what I expected to get - great!
Camera+ - again, to add the Vintage frame.
SP PhotoTada - to add the Taveler frame. All other sliders set to zero (= full left). But then I discovered the frame overlapping the Vintage frame a bit too much so I went back to the Vintage frame version and loaded it in...
FilterStorm4 - to add a 27% white frame without inner shadow. Then I went back to...
SP PhotoTada - - now I could add my desired framed without it overlapping too much.
TIP: If your desired frame is taking too much of your picture, create a place holder frame in FilterStorm first. A place holder frame is a sizable, flat uni-color frame that FilterStorm adds AROUND your picture, not over it. Then apply the frame you really want to have. That frame will then be placed over the place holder frame, not over your picture, so it will look like the frame was added around the picture, not over it. You better do a test with the desired frame first. Save that result and estimate how large it might be, then add a place holder frame in FilterStorm of about the same size. Save the picture and you are ready to add your final frame! If you aren't satisfied maybe because the place holder frame was too large just go back to FilterStorm and try again with a different percentage frame.
A+ Signature - for the usual copyright watermark.

Last week as the weather was still sunny I took the occasion of a break at Luxembourg main station to take some shots. I made the photos for this picture from the foot bridge that goes over the tracks. Because it was in the afternoon there wasn't much action at the station and now as there is winter, the sun was already very low. It was big fun to work on this picture today. It took a little while to get it done but that was mainly because I did a lot of testing and tried a lot of things before the outcome finally was what I expected.
Below are the photos that served to create this picture. They could have been better, had I taken my time to set the exposure measuring point manually in BracketMode.
~~~~~~~~~~~~~~~~~~~~~~~~~~~~~~~~~~~~~~~~~~~~~~~~~~~~~~

Tuesday, November 22, 2011

The Beauty of Destruction, part 8


Camera App: ClearCam


Additional Apps used:
BigLens - to separate the background from the foreground.
TiltShiftGen - for additional blurring in the foreground.
FilterStorm4 - for a simple b/w version.
Blender - to blend the b/w version with the color version to obtain more harmonic colors because especially the background had been much over-saturated with reddish tones.
FilterStorm4 - for saturating the foreground and a mask to keep the background desaturated.
PhotoForge2 - for a High Pass version.
Blender - to add a little more sharpness to the machine. At the same time this had the nice side effect to add a little structure to the blurred background.
TouchRetouch - for minor touchups.
Pixlromantic - for the frame.
A+Signature - for the copyright watermark.


November 21, 2011 @ 03.11pm - Demolition work at Luxembourg Railroad Yard continues. Gates had already been removed from Roundhouse #1. Turning table #1 also cut into pieces and removed, this machine now hammers the turning table pitch apart with a huge jackhammer.

Sunday, November 20, 2011

The Beauty of Destruction, part 7 - Old No.3


Camera App: BracketMode

Additional Apps used for processing:
ProHDR - to create a HDR picture from the shots made with BracketMode. Hower, I later discovered the HDR picture being partially unsharp which was the result of too much movement as I made the photos with BracketMode. So I decided to redo my picture, this time using only the darker photo of the set made because it was sharp all over.
SimplyHDR - to enhance the HDR picture created with ProHDR. If you want to create an HDR picture with an app that works with a set of photos make sure you don't saturate too much or your picture will look extremely over-saturated if you load it in yet another HDR app that works with single pictures, such as SimplyHDR. I was already much satisfied with the first result SimplyHDR came up with after loading my picture so I accept it the way it was and saved it.
Grungetastic - to experiment with because my the HDR version looked too boring to me. Testing various settings I finally stuck with Gritty 2 which I adapted to my likes. I pulled almost all sliders back to the left for zero effect except but for the tone slider which I left in its position. But Grunge 1, Grunge 2 and Papers had been set to full left and Borders had been set to No Border.
Blender - to blend my HDR with the Grunge version in Overlay mode, 50/50. Nice result, saved it.
PhotoForge - to create a version with High Pass filter because I wanted to add a little more sharpness. Sharpness could also have been added in Grungetastic but I haven't tested that feature yet.
Blender again - to sharpen my picture by blending it with the High Pass version in Overlay mode, 50/50 settings. Usually 50/50 looks right. To my taste more than 50% is overdoing the effect a bit.
After saving that result I was loading it again in Blender together with the HDR version before applying the Grunge effect because the picture looked a bit too greenish to me. I reduced that effect by setting the slider to 27% only, HDR loaded on the left side, greenish version loaded on the right side. Now I only needed a frame.
Grungetastic - I loaded my picture again in Grungetastic because I wanted a particular frame that I liked. Again I applied the Gritty 2 effect, pulling this time ALL of the sliders to the left, including the Tone slider, but for border I was choosing Border #13 (counted from left to right).
TouchRetouch - for minor touch-up. There had been a bright red little something laying underneath the wheel, disturbing the overall picture a bit so I removed it.
A+Signature - for the copyright watermark.

My latest picture from the "Beauty of Destruction" series shows wheel #3 of the now wrecked old electric locomotive #3609 of the National Railroad Company of Luxembourg, SNCFL. You can still see a number "3" pained in white on the wheel's glide bearing box. Attached to that box was also the speed gauge, a part that transformed the mechanical information received through the revolutions of the axle into electric tension to feed the Hasler-Bern speed indicator with in the cockpit. Also well visible are the wheel rim markings as broad yellow stripes (now bleached after long time weathering). The wheels on this type of engine had not been made in one piece but consisted of a wheel body and a rim that was shrunken onto the body in the workshops. For this purpose, the rim was heated up to a certain temperature because heating metal means the material will expand in its dimensions, hence the inner diameter got bigger and the wheel body could be inserted. Then the completed wheel was slowly cooled down, the rim shrunk again and got fixed in that way to the wheel's body. The reason for this type of railroad wheel simply was cost reduction because it was less expensive to replace a set of rims than replacing a complete axle with full body wheels. But like the advantage of this type of wheel was it to easily shrink a rim onto a wheel body, the disadvantage was that the rim could loosen again especially during a prolonged application of the brakes. Then the cast steel brake pads heated the rim up through friction. In the result the rim was loosening and turning on the wheel body. Under extreme conditions a wheel could be falling apart, with the certainly disastrous result of a heavy derailment of a train. To avoid this, the engineer had to check the markings on the wheel especially when preparing an engine for the day. The greatest railroad disaster as the result of a broken rim was the derailment and crash of the German high speed ICE 844 train "Wilhelm Conrad Röntgen" in 1998. The link goes to a video report on YouTube taken from a German TV documentation. I added this one because I couldn't find a suitable English report. But even if you don't understand German, the pictures show it all. In case of the ICE884 the train did not derail because a rim was overheating but because there had been fissures in it which had not been discovered due to technical inspections not being made.

Friday, November 18, 2011

The Beauty of Destruction, part 6 - Torch Cut


Camera App: BracketMode

Additional Apps used for post processing:

ProHDR - for an HDR picture made from one single photo. Reason: Because I had no tripod at hand I unfortunately moved a bit too much for ProHDR to align the two photos correctly, which resulted in an unsharp HDR picture. So I did an HDR from a single photo, choosing the darker one for it because the contrast and details had been much better on the molten metal surface than it was on the overexposed photo where that surface was almost white. White pixels contain no information thus they are useless for further processing but underexposed pictures may still be corrected for as long as there aren't too many black pixels included.
I saved two versions from ProHDR - one with low contrast but lighter and one with strong contrast but darker. Then I created an HDR picture again from these two versions in ProHDR. The result was a much better HDR picture than the first one. I also tried SimplyHDR, but no matter what settings I tried I wasn't satisfied with the outcome.
MonoPhix - to create a b/w version of my HDR picture. I prefer MonoPhix for this job because it allows to use color filters. I used a Yellow filter on the rusty surface to obtain a maximum of details. Blue is the complementary color of red, which means that a picture containing much red will turn very dark if you apply a blue filter. On the other hand a red filter applied on a red picture will let all red surfaces appear almost white while a red filter applied on a blue surface will let this one look almost black. Green is a more neutral filter so in most cases a green filter gives nice contrasts to a b/w picture. I was choosing a yellow filter because it gave me a lighter picture than the green filter gave me but still the picture had nice contrast and was rich on details. Don't believe me? Try it out and see yourself ;o)!
Blender - to blend the b/w version with the HDR version in normal mode. This de-saturated the picture a lot because I gave it only 27% of the HDR version.
ArtistaHaiku - for an outlined ink version, almost no color.
FilterStorm4 - one of the most powerful apps available for picture editing on iPhone and iPad recently had an update which motivated me to work with it and test the new version. I loved FilterStorm since I used it the first time because of it's well thought and ergonomic design. Beginners might feel a bit helpless at first because of the many features it offers but once you're used to it you don't want to miss it anymore. I opened the version created in Blender and I added the Ink version as a second exposure. Then I applied a Gradient mask, placing the big circle in the middle of the lower half on the right edge and pulling the small circle over to the the middle of the upper half on the left edge. This revealed the Ink layer partially, with a soft transition from right to left into the de-saturated HDR layer. But like the transition was soft and straight I saved this result and I reloaded it as a second exposure again to the de-satureated HDR version. I did this to apply a mask because I wanted the torch cut piece of steel standing out sharp from the Ink background. I loved the outcome of this and now I needed a suitable frame.
KingCamera - I loaded my picture into KingCamera because this app comes with some very nice frames and structures. The one that I liked is 9th from left in the line of frames. It has no specific name.
PicGrunger - for a slight Grunge look. I chose Aged effect, Strength set to about 25%. Style: Palooza, Texture: Original.
Perfectly Clear - After transferring my picture to my laptop computer I found that it could use a little more contrast which I changed in  Perfectly Clear. Usually this really cool app tends to brighten a picture up so I set Exposure to full left, Contrast and Vibrancy to full right plus I gave it a little more Sharpness.
A+Signature - after I was done with my picture all I needed was to add my copyright watermark but this time I wanted to give it an extra touch of my handwritten initials. A+Signature is just perfect for that job. You may add any handwritten or drawn markings to your pictures, scale them, turn them and place them wherever you want. To use the same stuff again and again you can even store your creations in the app catalog.

My new picture shows a steel part that was once holding one of the huge electric motors of old electric locomotive 3609, now cut apart with a powerful torch as the old lady got wrecked.

~~~~~~~~~~~~~~~~~~~~~~~~~~~~~~~~~~~~~~

Wednesday, November 16, 2011

The Beauty of Destruction, part 4


Camera App: BracketMode

Additional Apps used for post processing:
ProHDR - to create a HDR picture from the photos made with BracketMode.
SimplyHDR - to enhance that HDR picture further.
PhotoWizard - to create a nice Crayon version of the HDR picture.
Blender - to blend crayon with HDR 50/50 in Normal mode.
Pixlromantic - for the frame called Sand and a b/w effect called Tom. I saved both versions, color+Sand and Tom+Sand, then I blend both in Blender to reduce color saturation a bit.
PhotoForge2 - for a High Pass effect.
Blender - to blend High Pass with the Pixlromantic version 50/50 in Overlay mode to enhance sharpness.
FilterStorm3 - to apply a mask because I wanted more sharpness only on the molten and burned steel surface.
TouchRetouch - for some minor corrections. There had been a few drops of burned steel that appeared just as white spots in the background so I removed them.
A+Signature - for the copyright watermark

Old electric locomotive #3609 is laying in pieces, her body brutally ripped apart by the claws of a huge wrecking machine; her entrails cut apart by a cutting torch.... This had been a part of her braking system. The part in the background is one of the brake blocks, which had been made of cast steel.

In previous posts I described how to use a Pencil version of your picture made in Photo fx to blend it with the normal version in Blender to receive a nice outlining effect. I now discovered an even better solution because PhotoWizard includes a really beautiful Crayon filter that gives you a beautiful picture you can either use as it is or use it to blend it in Blender. But PhotoWizard has much more to offer than just that. Another app that I recommend because of its nice filters and frames is Pixlromantic.

Below is the Instagram version of this picture. Additionally to the effects described above I used the Sophia effect which gave the picture a blueish tint on the burned steel. Also I did not sharpen the burned steel surface but I did not apply one of the typical Instagram filters either cause I did not like any of them on this picture.


~~~~~~~~~~~~~~~~~~~~~~~~~~~~~~~~~~~~~~~~~~~~~~~~~~~~

Monday, November 14, 2011

The Beauty of Destruction, part 3


Camera App: BracketMode

Additional Apps used for post processing:

ProHDR - to create the basic HDR picture from the photos made with QuickPix
SimplyHDR - to enhance that basic HDR picture.
AutoPainter - to create an Aquarell version.
ArtistaHaiku - to create an ink version, almost an ink drawing with only the outlining and just a little bit of color.
Blender - to blend the Aquarell version with the ink version, then used again to blend the result with the HDR version. I wanted to give my picture a touch of a painting, not pure HDR and no pure painting either.
FilterStorm3 - for a Vignette effect. I wanted only a slight vignette effect so I needed an app that allows full control over it's intensity. FilterStorm3 does a perfect job here.
Camera+ - I used the Vibrant effect here to enhance the colors. In Camera+ this effect can be adjusted with a slider.
iDarkroom - for the Black frame.
A+Signature - for the copyright watermark.

Yesterday I still had time before driving my first train of the day so I took my profit out of the situation to take some more shots of the scrap yard where the old electric locomotives 3609 and 3612 are currently being wrecked. This picture shows a now broken porcelain isolator apparently (but not necessarily)  from the roof top of either of the two old engines.

Friday, November 11, 2011

The Beauty of Destruction, part 1


iPhone Model: 4
Camera App: BracketMode


Addtional Apps used for post processing:
ProHDR - to create a HDR picture from the shots made with BracketMode.
SimplyHDR - to enhance the previously created HDR picture. SimplyHDR provides a lot of settings, thus permitting to adjust a picture precisely after one's taste.
ArtistaHaiku - to create two ink versions of my SimplyHDR version. Like all the great apps made by Jixipix also ArtistaHaiku provides a lot of settings to control the effects. After I found what was looking for I created another version with less colors but a stronger structure effect.
Blender - as usual, Blender is one of the most important apps in the process of creation of my pictures. I used it many times again to try different blending effects with different versions of my picture. First I used it to blend the two ink versions in Overlay mode, then I was blending that result again with the HDR version in Overlay mode which gave me a structured ink version with enhanced colors. Then I blend that one again with the original HDR, this time in Normal mode, to reduce the ink effect again, because I wanted more of the original colors in my picture. Sometimes you'll have to play a lot with slider and blending effects in Blender until you found what you like. You should always save a result that you liked so you can use it again to try something different with it. If the result of an effect appears to be too strong for your taste, then just blend that result again with the previous version to reduce it again. You will mostly, but not necessarily use Normal mode to reduce an effect, adjusting the slider until you are satisfied with the result. 
Tip: To see the differences clearly just move the slider quickly from one side to the other, then adjust it to the desired intensity level.
VintageScene - after I was happy with my picture I was looking for a suitable frame. I rarely like standard frames provided by the apps but prefer to create my own. So I created a Grunge version of my picture in VintageScene. That version had a greenish-gray color. 
Snapseed - to create another frame with an irregular black line and a white outer frame. My idea was it to replace that white frame with a structured frame again. The base for the structured frame was the Grunge version I previously created in VintageScene.
FilterStorm3 -  is one of the best apps available to deal with layers and masks. In FilterStorm I imported the Grunge version as a second exposure, then I applied a mask over the white border to bring out the edge of the Grunge layer. One of the nice features in FilterStorm is the option to show the painted mask in a red translucent color which gives you pixel precise control over its application. If you run a bit too far with your Brush, don't worry. Just use the Eraser to paint that part back.


After I had finally painted my frame I had to discover that the greenish-gray tone didn't go well with the colors of my picture so I decided to de-saturate the frame. In FilterStorm3 this is easily done. Just choose the Hue/Saturation option from the list of filters, pull the slider down to a value that you like (in my case -65%) then choose the Brush in the right side to paint on your mask. Confirm the operation after painting and you're done (Don't forget to save your result indeed).
A+Signature - to add my copyright watermark. It's my favorite app to add such watermarks, especially because it comes with a huge number of fonts and because you can create any objects or words to use. Just paint hearts, flowers, handwritten words or whatever with your finger, then add it to the database for later use if you want to re-use it again. You can easily adjust the size and color of your object, add an outline of shadow and turn it any way around.


Before transferring my pictures to my laptop comuter (I prefer using PhotoSync for this) I checked if the picture size was still anything close to original size by using the very handy little tool app called PhotoSize. I discovered that a handfull of pixels got lost on the way from the original photos to the final picture. Size was down from 2592x1935px to 2588x1927px. This happened as a result of ProHDR aligning the photos that served to create the HDR version of my picture because I didn't use a tripod as I made the photos and no matter how steady one's holding a camera in one's hand, the human body is always moving a bit. I brought picture size back to original size by using Iris, which is my favorite, but you may also use FilterStorm or any other app that offers that option. I prefer Iris for that kind of operation since it allows me to type in the dimensions by numbers, which allows to define picture size on the pixel precise.


After transferring the pictures to my laptop computer I wasn't satisfied with the look of the colors yet. For that reason I opened my final picture in Perfectly Clear to enhance it, which worked well for me. Again I transferred that picture to the laptop computer to check it on the big screen. Checking your work is important because on a big screen you can see things you can't see on the tiny iPhone screen. Also pictures displayed on the iPhone are being optimized for best possible viewing experience so they usually look better on the iPhone than they look like on any other computer. To enhance colors I opened my last version - the one that I optimized in Perfectly Clear - in FilterStorm again. I applied two different saturation settings, one with 27% and one with 45% and saved both, then I transferred both to the laptop computer to compare them. I finally decided to stick with the richer colors, hence I used the version saturated by 45%. 


Do you like it? The most important thing about creativity of any kind, be it photography, iPhoneography, real painting and drawing, sculpting... whatever you do, the most important thing is that YOU are happy with your creation, no matter what the rest of the world says. It is of course even more satisfying to receive positive feedback from other people, especially those you share your passion with, but it's not a must. Just think over the question if you want to produce artwork for the masses, or artwork for your happiness? Frankly, my own happiness matters more to me than the taste of the masses does and the creation of this picture was giving me much fun.


This composition shows you only 8 of the steps it took to create my final picture (on the low right) from the two original photos (on the top left).


Sadly, the reasons behind this picture are not that fun at all, especially not for railroad fans. Currently there's important transformation work going on in the Railroad Yard of Luxembourg-City. The old roundhouse is being demolished and two of the old electrical engines, numbers 3609 and 3612 fell victim to the cutting torches. I made quite a bucket full of pictures of the remains of the two old engines yesterday as my work of the day was done and daylight was still good enough to make pictures. Sadly I had no time for photographing as the slaughter begun. Only the night before I came along the place on the end of my shift and I saw this:


~~~~~~~~~~~~~~~~~~~~~~~~~~~~~~~~~~~~~~~~~~~~~~~~~~


Friday, October 28, 2011

Scrapped

Camera Apps:
BracketMode - for the photos that served as the base for the HDR picture.
Hipstamatic - for the b/w retro photo on the end of this page.
Additional Apps used:
iCameraHDR - for the HDR picture made from the the BracketMode photos.
SimplyHDR - to enhance the HDR effect and for fine tuning.
MonoPhix - to create a b/w version of the HDR. No color filter applied, shades set to 0.
Blender - to blend the color HDR with the b/w HDR to enhance colors and contrast. Blending mode was Overlay, slider set to 27% only. More would have darken the sky too much.
Camera+ - for the nice frame. I used the frame called Light Grid. There are other apps offering similar frames but I prefer the one provided by Camera+.
MergeEasy - to put the pictures of the different steps together in a strip so you can see the differences.
A+Signature - for my copyright watermark as well as the labels on the photo strip.
Old 3612 now awaits the cutting torch after being partially scrapped of usable parts. I'm not sure with this but it could be the parts scrapped from her served to restore 3608 to factory fresh condition. Currently 3608 is in the paint shop where she'll be repainted in her original green+gray colors from 1956. The above photo strip show the different steps I made until the final picture before the frame was added. The picture below shows the engine's number with the modern company logo CFL.
~~~~~~~~~~~~~~~~~~~~~~~~~~~~~~~~~~~~~~~~~~~~~~~~~~~~~~~~
~~~~~~~~~~~~~~~~~~~~~~~~~~~~~~~~~~~~~~~~~~~~~~~~~~~~~~~~

Friday, October 21, 2011

The Beauty of Decay, Part 3.


Camera Apps: 
BracketMode
Hipstamatic - for the b/w pictures in the photo slide. Lens: Melodie, Film: A0 DLX


Additional Apps used:
iCameraHDR - for the HDR pictures in color.

SimplyHDR - to create two different HDR pictures with darker and lighter settings
Blender - to blend those two HDRs into one with 50/50 slider setting in Normal mode which nicely enhanced the picture.
MonoPhix - for a b/w version of the HDR picture. I usually chose a green filter with low shadow darkening
Blender again - this picture did not need too much blending because it turned already out very nicely after processing it in iCameraHDR. I created a b/w version to blend with the color version to obtain better contrast and richer colors but it didn't need a high setting of the slider to enhance it. Less is sometimes more. 

Snapseed - for adding some slight Drama effect plus enhancing saturation slightly.

PicGrunger - for a nice Grunge version with Metal structure. Even with the effect slider set to zero the picture turns out darker after processing but like I wanted only the frame I was loading the grunge version and the original version in FilterStorm3 to erase the dark picture from the frame so the lighter version came trough.EasyMerge - to quickly create a photo slide with four Hipstamaticphotos of the old steam engine.
As usual I added my copyright watermark in A+Signature.


This is the last one of the rusted wheels pictures of the old steam engine 5621. I enjoyed a lot making it because the structures of the rust and the colors turned out nicely.

Tuesday, October 18, 2011

The Beauty of Decay, Part 1.


Camera Apps: 
BracketMode - for the photos serving for the HDR pictures
Hipstamatic - for the b/w pictures in the photo slide. Lens: Melodie, Film: A0 DLX


Additional Apps used (as far as I remember):
iCameraHDR - for the HDR pictures in color.
PerfectlyClear - to enhance the previouly created HDR pictures. This app is really helpful to create better pictures. Unfortunately it is a memory hog, often coming up with an out of memory error when processing a second picture. In this case all you need to do is closing all the apps running in the background, then restart PerfectlyClear again. No iPhone reboot required.
MonoPhix - for b/w versions of the HDR pictures.
Blender - to blend a lot! I can't even remember how many times I blend what layers because I did not write all the steps down. But I used b/w versions to blend with color versions to obtain better contrast and richer colors and I also used Blender to sharpen the final pictures a bit by application of my technique to create a high pass version in PhotoForge, then blend it with the normal version in Blender with mode set to Overlay. In case of this picture I always set the slider to 50/50, hence in the middle.
FilterStorm3 - to create a 3 nice frame. I used 10-20-10% for the three frames.
PicGrunger - to create a grunge version of my picture with the only goal to receive a badly worn and dirty frame that I wanted on my clean picture. Here I used the Metal texture with Scratched effect.
Superimpose - to put the grunge picture over the clean picture, masking the picture to cut it from the frame so the clean picture from the background layer could appear. This was quite a bit tricky to handle on the tiny iPhone screen but it all went well. Superimpose is currently the best masking app that I know.
Checking my final picture on the big screen I found some white spots, probably bird dung that I removed using TouchRetouch.
Apparently one of the apps that I used downsized the picture slightly so I had to resize it back to 2592x1936 in Iris. I still don't know what app was responsible for that but will check that out. 
EasyMerge - to quickly create a photo slide with four Hipstamatic photos of the old steam engine.
As usual I added my copyright watermark in A+Signature.


Since long years there is a disassembled old steam engine slowly rotting away at Luxembourg railroad yard. It's number is 5621 and it is said it was a so called "Kriegslok" - a war engine ordered by the German Reichsbahn as the Grand-Duchy of Luxembourg was still occupied by the Germans in WWII. The engines had been build in Austria. But then the war ended and the remaining engines of that order got delivered to the newly founded "Société Nationale des Chemins de Fer de Luxembourg  (SNCFL) - the National Railway Company of  Luxembourg. I don't know much about the complete history of engine #5621 but it was still running as a tourist attraction in the 1970s. Later it needed restoration and some bloody amateurs took it apart, not possessing the knowledge to perform a proper restoration nor having the funds for it. Now it's slowly rotting away and nobody knows if it will ever be restored to it's old beauty again. At least it is a nice subject for pictures so I took another chance yesterday to photograph it again. This picture is part one of a set of two. 


Monday, October 3, 2011

All Gone


Camera App: BracketMode
Extras: Ollo Clip 3in1 lens system - wide angle lens used.

Additional Apps used:

iCameraHDR - to create a HDR picture from the shots made with BracketMode.
Camera+ - to apply the "clarity" filter which greatly enhanced the picture. With many thanks to Harry Sandler for this very useful tip.
DramaticB&W - to create a b&w version of my picture. I created  two versions - one where I used the preset style "Infrared4" and one where I used the style "Dramatic2". I played around a bit the the color filters until I had the look that I liked. I also set grain to zero because the pictures came out already grainy after the creation of the HDR. 
Blender - I wasn't completely satisfied with neither b&w version, the infrared version being a bit too bright and the dramatic version being too dark so I decided to load them both into Blender and see what I can do with it. Blending them in overlay mode with a 50:50 slider setting finally gave me the result I was looking after.
Iris - to crop and resize the picture.
TouchRetouch - to remove a litte white spot.
FilterStorm - to create a nice white frame with a thin black line in it. FilterStorm had the great advantage to add an outlining shadow to a frame, which can be adjusted. Standard setting is light gray but I set it to a very dark grey. I applied a 10% white frame first, then added a 5% black frame before I finally added a15% white frame again. Because of the added outlines the frame looks very nice to me.
A+Signature - to add my copyright watermark.

Yesterday I started working in the late afternoon as the sun was already low and bright. Because I still had time before departure of my first train to drive on that day I took my chance to make some photos inside of the now empty roundhouse #1 of the old railroad yard in Luxembourg. I still don't know when the demolition team will come to break this all down but I sincerely hope to get a chance to photograph the sad event. Below is the first picture that I created. The procedure was about the same as the one describing the making of the b&w picture with the only difference that I did not use DramticB&W and Blender on this one.


~~~~~~~~~~~~~~~~~~~~~~~~~~~~~~~~~~~~~~~~~~~~~~~~~~~~~~~~~

Saturday, October 1, 2011

Where Generations Walked


Camera Apps: 
BracketMode - for the stairway photos
Lomora2 - for the photo of the building

Additional Apps used:
iCameraHDR - to make an HDR picture from the photos shot with BracketMode. The camera app is very handy if you want to make HDRs but prefer processing the photos later. BracketMode shoots two photos, a light one and a dark one which are automatically saved on the iPhone Camera Roll.
Romantic - for a dreamy effect. Romantic was made bei none less than JixiPix, the makers or the Artista apps.
PicGrunger - for the frame and a minimal grunge effect.
TouchRetouch - for slight retouching. I only removed two little white spots up left in the picture plus a very dark stroke on the lower right corner of the frame with it.
PhotoForge - to create a high pass effect on the picture for sharpening.
Blender - to blend the high pass picture with the normal picture which nicely enhanced sharpness and clearance but reduced the dreamy effect a little. You now maybe ask why I sharpened the picture after I added the frame. Well, this is a matter of personal taste indeed. You may do as you like. I usually finish a picture before I put it in a frame, but in this case I thought it could be nice to have the structure of the frame also enhanced, and for that reason I applied my sharpness trick after I finished the picture. There are frames the effect will do well but there are sure other frames where it won't work. Just try it out and use what you like.
A+Signature - for the copyright watermark

Yesterday I was at work early so I took a little time strolling over the ground of the old railroad yard to make some photos because soon the old buildings will be flattened to make room for the expansion of the new maintenance center. The stairs in this picture are in the old building that still holds the locker rooms of locomotive engineers and maintenance crews as well as offices, a conference room, bedrooms for the foreign engineers who once used to spend the night there, and there's even a kitchen. Also in this building is our old reserve room where we spend our reserve time, meaning the shifts setup to have personnel in reserve for the case a colleague reports sick, or other irregularities in the organisation of rail traffic required additional help.


Somebody once gave the name "Hotel Simon" to the building. "Hotel" maybe because it once hosted our foreign colleagues when they had to spend the night abroad to respect their resting times. And "Simon" maybe because this is the name of a very popular breweries in the country. Who ever knows, I don't. On the Lomora photo you can see the building, with the old roundhouse in the back ground. The warning sign translates as "Danger, the pedestrian crosses the tracks on his own risk and responsibility".

My main picture shows the stairway that leads from the old reserve room down to the court. Standing there yesterday I was wondering how many engineers walked that way down when they had been called for some special task while they had been on reserve duty? It must have been quite some generations since WWII ended and everything had been rebuild. I too was one of these guys. For that I gave my picture the title "Where Generations Walked".