Showing posts with label Artista. Show all posts

Sunday, July 15, 2012

Tiny Aliens


Camera Apps: Hipstamatic, CCD,
Extras: Ollo Clip 3in1 Lens System, Macro Lens

Additional Apps used for post processing:
PhotoForge2 - for the usual High Pass versions needed for re-sharpening the photos.
PhotoWizard - for the Emboss effect needed to work out the structure in the main picture. I was blending the embossed version 4x with the previous version in Blender to get the structure effect that you can see in the main picture (top)
Photo fx Ultra - for various enhancements and cropping operations. but especially for the Day for Night effect.
Blender - for many blending operations.
ArtistaSketch HD - for clean sketches of the photos needed to blend in Blender to bring out details in the picture. Pencil sketches are very useful to enhance the outlining in pictures. I usually blend them in either Multiply mode or Overlay mode. You must play around with it and see for yourself what works for your picture. I cannot provide you a basic recipe here. What works for one picture does not necessarily work for another picture as well. That's the experience I made.
TouchRetouch HD - for touch-ups. Strangely there had been some ugly spots left on the drawings created with ArtistaSketch so I removed them before using the sketch version in Blender.
Laminar - for it's great light system used in the picture where the mother plant deploys an egg from one of the cocoons.
iPhoto - for local softening. I love iPhoto for it's "brushes" that can be used locally in pictures. If you want to apply an effect on the whole picture you can choose that option in the brush settings.
LensFlare HD - for the light effects in the blue pictures. Sadly, working with LensFlare is a pain in the ass because it has no undo function which is very annoying to me, but in the end I managed to obtain some useful results nevertheless.
Pixlromatic - for some of the frames.
A+Signature - for the copyright watermarks

Well.... two days ago I looked at one of my wife's flower pots purely by chance which let me discover a beautiful miniature "forest" of some strange little plant I never saw before. So I decided to photograph it. I made over 200 photos, but only few had been really useful. First I shot with the 645pro - the camera app that currently provides you the very best picture quality available on the iPhone. But the 645pro pissed me off once more because it ruined a countless number of really good shots as it crashed again and again. It might provide the best picture quality, but that's useless if the app is crashing that often. So I switched to CCD, which is the other app that saves dRAWs in TIFF format. It's a pure and rather simple camera app without all the fancy camera-simulator-wannabe-pro stuff that comes with the 645pro, but at least it works reliably. It never crashed.


The night scene of that little jungle of alien plants... I really love that miniature world in that flower pot! The night effect had been created with the "Day for Night" effect in Photo fx Ultra. The rays of light had been added with LensFlare HD. The frame was added in Pixlromatic.


Alien Mother deploys an egg from one of the cocoons... Donno what strange little plant that is but isn't it fascinating how it grows in sort of a miniature jungle and how it multiplies itself? Other plants use the wind to distribute their seeds in the world, or use even living animals to carry the seeds to a location far from the mother plant. But this little plant deploys the seeds from cocoons it carries underneath. I only discovered this as I did some shots with the macro lens of the Ollo Clip. Here the iPhone plaid out it's big advantage of being slim and small, compared to other cameras, because there was only little space left in the flower pot to put the camera down enough for shooting from the ant view low over ground. The light effects had been created with Laminar first, then with LensFlare HD.


Hipstamatic shot of the tiny jungle. Combo used was John S lens with Ina's 1982 film


Another Hipstamatic shot made with the Ollo Clip Macro Lens. Combo John S / Ina's 1982.


The original CCD photo used to create the main picture on this page. I cropped it to 1:1 format using Squaready.


The flower pot, where that tiny little alien plant grows... Photo made with CCD, cropped and framed with Pixlromatic.

I'm sorry for not being able to provide you in depth step-by-step instructions about the making of of the pictures on this page but I really plaid around a lot with many different apps until I obtained satisfying results. But don't hesitate to contact me in case you got questions. I'll be happy to assist you with anything you want to know.
~~~~~~~~~~~~~~~~~~~~~~~~~~~~~~~~~~~~~~~~~~~~~~~~~~

Tuesday, June 5, 2012

Buttercup Bud


Camera App: 645pro
Extras: Ollo Clip 3in1 Lens System, Macro Lens

Additional Apps used for post processing:

PhotoForge2 - for a High Pass filter version
Blender - to re-sharpen the photo a bit by blending the High Pass version with the original photo in Overlay mode
ArtistaSketch - for a clean pencil sketch version
Blender - to blend the pencil version with the previous version to enhance sharpness, contrast and colors
MokuHD - to see what result Moku will give me...
AristaOil - to see that my picture will look like in oil...
Blender - to see what the result will be when blending the Moku version with the Oil version - and I liked the outcome a lot!
Blender and Blender again - to blend that version with the Sketch version again, then with the Oil version again, then with the original photo again to enhance details...
Camera+ - for the beautiful vintage paper frame
Pixlromatic - for the Perga frame. I love the Camera+ frame a lot but I wanted to make it look a bit different on  this picture.
A+Signature - for the copyright watermark handwritten signature as well as the markings on the composition of the steps I took to make this picture.


Sometimes it pays to put your work aside and let it sleep for a while if you aren't completely satisfied with it. In this case I was playing around with some apps for a while but I wasn't satisfied with the outcome of my picture so I dropped it, but I didn't delete the files. That was about two weeks ago. Now I had a different idea. I created an Artista Moku version as well as an Artista Oil version and I liked the outcome a lot. Then I was blending both versions in Blender and I was blown away by the beautiful result I got. Playing around with Blender a bit more I finally created a picture that I really loved. What about you? Do you like it?

The composition above show you some of the steps I took to create this picture. If you got questions about techniques used please feel free to leave your comment. You may also find me on Facebook: http://www.facebook.com/quaffit. Add me as your friend and we may discuss iPhoneography in detail if you like.
~~~~~~~~~~~~~~~~~~~~~~~~~~~~~~~~~~~~~~~~

Saturday, April 21, 2012

Alu-Chips!


Camera App: 645 pro

Additional Apps used for post processing:
Moku Hanga HD - for a Moku painting version
procreate + Nomad brush - to repaint parts of the picture because I wasn't fully satisfied with the outcome of the Moku painting. Procreate is really a brilliant app! I love it! Unfortunately it only supports up to 1920x1408 resolution and no 1:1 format but this isn't a problem. Just import your 1:1 basic photo and when you're done crop it back to 1:1 format in Squaready.
Squaready - for the cropping.
TouchRetouch HD - for some touchups.
Pixlromatic - for a special b/w effect.
Blender - I used Blender a lot to blend the b/w version with the color version quite a few times. The color version was a bit too brownish for my taste.
Camera+ - for the frame, which I cropped down to a smaller frame using Squaready.
A+Signature - for the usual copyright watermark.

In the former German Democratic Republic people used to refer to their coins as being "alu chips" because the 1, 5, 10, 50 Pfennig pieces as well as the 1 and 2 Mark pieces had been made of a lightweight alloy that sure contained a lot of aluminum. But not all coins had been made of that alloy. In my picture you can see a big 20 Mark coin as well as a reversed 5 Mark coin (Meißen) which had been made of a Nickel alloy. I still have a good hand full of GDR coins which are linked to some very special memories of mine because my beloved wife is from GDR. Back in 1985 GDR still existed. I lived there for 7 weeks after a long 5 1/2 month separation from her because the Commies didn't grant me a VISA anymore after she had filed in her official request to marry a foreigner (me). But luck was on our side and could marry the same year. December 24, 1985 I received the most wonderful Christmas gift of my life as my wife could leave GDR to move to Luxembourg where she arrived on December the 24th.

Thursday, December 22, 2011

Lest We Forget


Camera: Canon EOS40D with 17-85mm EF USM

Original RAW file developed and cropped with Canon Digital Photo Professional

Apps used for post processing:
1) SimplyHDR - for a HDR version of the photo.
2) ArtistaOil - for a simulated oil painting.
3) Blender - to blend the HDR version with the oil version 50/50. This added some details to the oil version which was important for the crosses in the background.
4) FilterStorm Pro - I imported the Blender result and the HDR version into FilterStorm Pro where I painted a mask to erase the grave cross and the flowers from the oil layer so that it was coming through from the HDR layer.
5) Blender - I blend the FilterStorm result with the result from step 3 again to smooth the edges of the flowers and cross.
6) Photo fx Ultra - to add a glow effect.
7) Blender - to blend the result from step 6 with the result from step 5.
8) Photo fx Ultra again - to add the Depth of Field effect. This nicely blurred the background a bit.
9) TouchRetouch HD - to remove an unwanted lantern pole from the background.
10) Camera+ - to add the nice Vintage border.
11) ArtisataOil again - to create an oil version with the a maximum of bristle depth and canvas effect. I did this because I wanted some texture in the frame.
12) FilterStorm Pro again - I imported the results from steps 10+11 into FilterStorm and painted a mask over the frame to bring the texture out.
13) TouchRetouch - to touch up the inner border of the frame a bit.
14) Crop 'n Frame - to cut the very large frame to smaller size again. I usually prefer the neat little tool Crop Suey for this but it apparently has some problems with large files because it used to crash.
15) A+Signature - for the copyright watermark.


It was on May 4, 2008, as I visited the US Military Cemetery Meuse-Argonne in Romagne in France together with two friends of mine. It's the largest US Military Cemetery in France, if not in Europe, where more than 14,000 men found their final rest. One of them is Sergeant Bernard L. Pohlpeter (photo) who fought with the L Company of the 126th US Army Infantry Regiment, 32nd Division. He got killed in action in the Meuse-Argonne Offensive in October 1918, only one month before the war ended on November the 11th. I did some research about Sergeant Pohlpeter and I found a copy of his regiments history online at this page: The Old Command. His grave is at Plot F, row 12, grave 23.

Although the day of death marked on Sergeant Pohlpeter's cross is October the 12th, 1918, he is listed in his regiments casualties list on page 42 as having been KIA on October the 5th. Reading through the regiment's history I also found no report about combat action of his unit for October the 12th but the unit took heavy casualties in the time from October 4-5. So I now wonder what's the truth is. 

As we walked the beautifully made cemetery in awe and respect, we spoke little because nobody wanted to disturb the silence on that place where so many of those men rest who fought for our freedom. So many graves... so many names... so many individual destinies... It really fills on'e heart with sadness to see so many white crosses on such huge fields.
~~~~~~~~~~~~~~~~~~~~~~~~~~~~~~~~~~~~~~~~

Wednesday, December 21, 2011

The Ruins of Montfaucon


Camera: Canon EOS40D with 17-85mm EF USM Kit Lens

Original RAW file developed with Canon Digital Photo Professional.

Apps used for post processing:
SimplyHDR-HD - for a HDR version.
ArtistaOil-HD - for an oil painting simulation.
Photo fx Ultra - for various effects and enhancements.
Blender - to blend a lot. I cannot remember how often I blend what version with what version. I just kept on playing around with it until my picture looked right to me.
TouchRetouch HD - for minor touchups
A+ Signature - for the copyright watermark.

May 4, 2008 I was visiting the region of Verdun in France together with two friends of mine, where one of the fiercest battles of the whole 20th century raged in World War 1. We planned to visit the US Military Cemetery of Romagne-sous-Montfaucon, but stopped on every occasion we found something that caught our interest. One of the places we stopped at was the ruins of the village of Montfaucon with the nearby monument erected for the U.S. troops that fought in this sector. The village of Montfaucon had been completely destroyed in the battle of Verdun. This picture shows the ruins of the church of Montfaucon, with the observation post build by the Germans. From this place. the German "Kronprinz" observed the battlefield.

There's a plaque attached to the observation post. It reads the following, original text (I did not do that translation):

HISTORY

THE RUINS WHICH YOU SEE HERE ARE WHAT WAS THE PARISH CHURCH OF THE VILLAGE OF MOUNTFAUCON (MOUNT FALCON) UNTIL 1914.

ON THIS PEAK, WHICH WAS 342 METERS (1.122 FEET) IN ELEVATION, MONTFAUCON WAS FOUNDED IN THE YEAR 587 BY THE MONK SAINT BALDERIC, GRANDSON OF CLOTAIRE, WHO ESTABLISHED A MONASTERY. TRADITION TELLS US THAT HE WAS GUIDED BY A FALCON, THE ORIGIN OF THE NAME OF THE VILLAGE.

BECAUSE OF ITS GEOGRAPHIC LOCATION, THIS VILLAGE HAS SUFFERED REPEATED INVASIONS AND WAS COMPLETELY DESTROYED MORE THAN TEN TIMES DURING THE COURSE OF HISTORY. HERE KIND EUDES LAUNCHED A GREAT BATTLE AGAINST THE NORMANS ON JUNE 24, 888.

ON 11. SEPTEMBER, 1914, THE VILLAGE, WHICH COMPRISED 900 INHABITANTS, WAS CAPTURED AND BURNED BY THE GERMAN ARMY. AS AN IMPORTANT STRATEGIC POINT, THE GERMAN ARMY ESTABLISHED 17 ARMED OBSERVATION POSTS (BLOCKHOUSES) IN THE RUINS. SOME OF THESE ARE STILL VISIBLE, NOTABLY THE ONE CALLED THE "OBSERVATOIRE DU KRONPRINZ" WHICH IS LOCATED AT THE CENTER OF THE OLD CHURCH.

DURING NEARLY FOUR YEARS FRENCH ARTILLERY SHELLED THE SITE WITHOUT RESULT OTHER THAN TO COMPLETE THE DESTRUCTION OF THE BUILDINGS.

ON 26 AND 27 SEPTEMBER, 1918, THROUGH THE COMBINED EFFORTS OF THE U.S. AND FRENCH ARMIES UNDER THE COMMAND OF GENERALS PERSHING AND GOURAND, A POWERFUL ATTACK PERMITTED THE U.S. 313TH REGIMENT OF THE 79TH INFANTRY DIVISION TO SEIZE THIS PEAK THIS NEW BATTLE OF MONTFAUCON PERMITTED THE ALLIES TO CLEAR THIS SECTOR OF THE FRONT AND TO MAKE AND ADVANCE OF MORE THAN 50 KILOMETERS (30 MILES).

TO COMMEMORATE THIS ACTION AND IN MEMORY OF MORE THAN 100,000 U.S. SOLDIERS WHO DIED OR WERE WOUNDED ON THE BATTLEFIELDS OF THE AREA, THE UNITED STATES OF AMERICA ERECTED THIS COLUMN OF GRANITE AS A TESTIMONIAL TO THEIR MANY SACRIFICES FOR FREEDOM.


~~~~~~~~~~~~~~~~~~~~~~~~~~~~~~~~~~~~~~~~~~~~~~~~~~

Tuesday, December 13, 2011

Rue de la Concorde (in Arlon, Belgium).


Camera: Canon EOS40D with17-85mm EF USM kit lens

RAW file developed and cropped in Canon Digital Photo Professional.
Apps used for postprocessing on the iPad:

First I created two versions of this picture in Canon's DPP, one slightly overexposed + one slightley underexposed. I saved the files in 16bit JPG format and transferred them to my iPad using PhotoSync. This neat little app is a real must-have for quick and easy picture transfers between iPad+iPhone+Computer. You can send from any iDevice to any other iDevice where the app is running, plus you can send from your iDevice to your Windows PC or Mac. In case you have no WiFi connection, you can do the transfer over a Bluetooth connection. Tip: Alternatively you can use Apple's Camera Connection Kit for iPad (MC531ZM/A) for quick photo transfers from iPhone to iPad. The kit is meant to connect either your digicam, DSLR or SD-Card to the iPad but if you connect your iPhone to it instead, the iPhone is being identified as a camera, allowing to transfer your photos to the iPad.

ProHDR - to create a HDR picture from the two original photos.
SimplyHDR - to enhance the HDR picture further. I was choosing a color overlay with a warm center (brownish, orange) and cold borders (gray). This nicely enhanced the picture but like the center was brownish and orange, also the lantern glasses and the roof of the last house on the picture had been tinted orange, which I didn't like. More about the lanterns later in this listing.
Photo fx Ultra - for a pencil drawing of the first HDR picture made with ProHDR.
Blender - to blend the pencil drawing with the SimpyHDR version. This nicely enhanced the outlines of the buildings. Blending the pictures in Overlay mode keeps the colors but enhances details in the picture.
TonaloptiaHD - for a black and white version of my picture. I switched from MonoPhix to TonalOptia because the developers of MonoPhix dropped color filter support in the HD version. I really have no understanding for that. The HD version appears very unfinished to me. I wrote to the developers but got no response. So their app is history now for me and I'm glad there is Tonaloptia, which includes various color filters plus a train load full of options to fine tune your picture. I was choosing a yellow filter on the b/w picture.
FilterStorm Pro - I noticed the lantern glasses and the roof had been tinted orange too so I opened the color version of my picture in FilterStorm Pro where I added the b/w version of it as a second exposure. Using the masking brush I masked off the lanterns, or to say it in other words, I brushed the b/w lanterns and roof free in the color picture so the b/w parts came trough. But now these parts had been b/w, which still didn't look right.
Blender - I was blending the new version, which had the b/w parts in it, with the color version in Blender, Normal mode, to add a little bit of color again to the b/w parts to let these parts look realistic again.
Photo fx Ultra - to apply a dreamy effect to my picture. I used the SoftFX effect No. 10 for it. This created a very dreamy version of my picture, which was what I wanted to have because I intended to reduce the effect anyway.
Blender - to blend the dreamy version with the non-dreamy version 65/35 in normal mode. Then I was loading this new version in Blender again to blend it with the pencil version which enhanced details a little more. I used only a 12% slider setting in Normal mode, color picture on the left side, pencil drawing on the right side, slider set 12% from the left.
Camera+ - for the beautiful old-fashion paper frame. I just love that frame!

March this year I did a photo walk with a friend in Arlon, a little Belgian town only a few miles from the border with Luxembourg. At that time I still had no clue about iPhoneography so I made my photos mostly with my DSLR camera. The photo that served as the base for this picture didn't even look good enough to me for making something special out of it in PhotoShop. But thanks to the iPad and the wonderful apps that exist I could finally make something out of it that I like. The buildings shown in this picture represent the typical architecture from the end of the 19th century and the first half of the 20th century in Southern Wallonia (also known as "Le Pays de la Gaume), as well as in the Eiffel and Luxembourg.

~~~~~~~~~~~~~~~~~~~~~~~~~~~~~~~~~~~~~~~~~~~~~~~

Monday, December 12, 2011

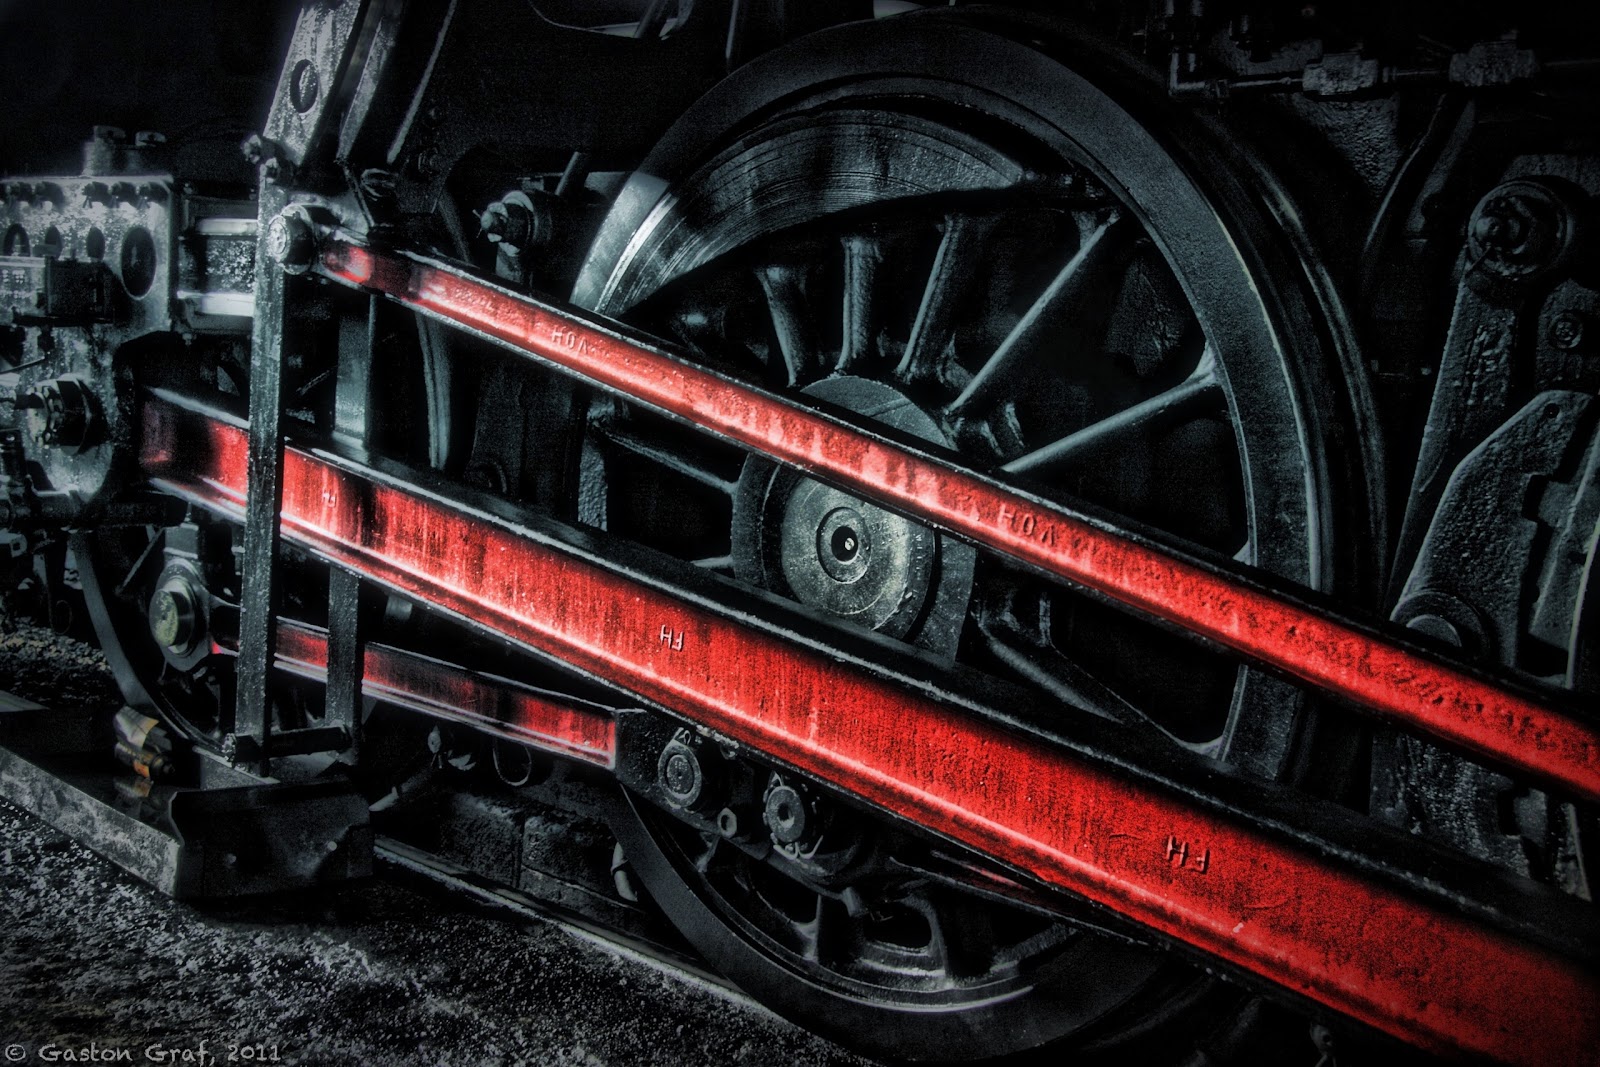
Black Wheel of Power


Camera: Canon EOS40D with 17-85mm EF USM kit lens.


RAW file developed in Canon Digital Photo Professional.
Photo processed on iPad2 with the following apps:
SimplyHDR-HD, Photo fx Ultra, Blender, FilterStorm Pro, Snapseed and TouchRetouch HD. Unfortunately I cannot provide details about every step I took to create this picture because I was playing around with a lot of apps but in the end I wasn't satisfied with the results so I went back to the beginning and restarted from HDR version made with SimplyHDR-HD. I used Photo Fx Ultra + Blender to work out the colors because I wanted to have a deep black wheel. I resized the picture in FilterStorm Pro, added some structure in Snapseed and removed some unwanted white spots with TouchRetouch HD.
A+Signature was used for the copyright watermark, as usual.


This is one of the big power wheels of steam engine 5519, photographed as the engine was in the shed. Railroad friends may find more information at the website of 5519. Unfortunately the website is in German only but you may find photos of the engine in action if you click on the word "Foto" in the top row of the page.

This picture is based on an analog photo I made a few years ago, in 2005 maybe. I happened to just return with the old switcher engine 910 which is visible in the background, as 5519 rumbled onto the turning table.


In World War II, as the Grand-Duchy of Luxembourg had been occupied by the Germans, the Reichsbahn ordered a set of 20 steam engines of the class 42 at the "Wiener Lokomotivfabrik Floridsdorf (WLF)" in Vienna in Austria but the engines couldn't be delivered to the Germans anymore as the war then ended. So the national railroad company SNCFL received these engines by the end of 1948, beginning of 1949, registering them as class 55. Engine # 5519 had been build in 1948 in Vienna Floridsdorf. It's "Fabriknummer" (serial no.) was 17615. Initially, the German Reichsbahn had planned to let it run unter the number 42 2718.
In service of the SNCFL this type was mainly used to haul coal and ore trains. It remained in service until the early 1960s as the costly steam engines got replaced by new class 3600 (electric) and the new classes 1600 and 1800 (diesel).
I still remember 5519 rotting away in the town park of Bettembourg, as I was a boy of 14. But 8 years later some railroad enthusiasts made an incredible effort to restore and save it. Now good old 5519 lives a new life again as a very popular tourist attraction, hauling tourist trains to Germany, France and Belgium.


Btw: if you're interested to have a ride then please contact the operators from their website. You may order tickets over the Internet.


This is the Instagram version of my picture. I really cannot say which version I like most, the original size, or the square size. Decide for yourself:


Questions? Send me an email to (quaffit(at)gmail.com) or leave me a comment ;o)!
Note: Please replace (at) with @ in my email address. This is a simple measure to prevent spam bots from harvesting addresses.


~~~~~~~~~~~~~~~~~~~~~~~~~~~~~~~~~~~~~~~~~~~~~~~~~~~~~~

Sunday, December 4, 2011

First Haircut


Camera: Canon EOS100 with 35-135 USM lens, film unknown,
Year the photo was made: 1996

Apps used for post processing:

MobileMonetHD - for a soft color version of the original photo.
Blender - to blend the original photo with the MobileMonet version.
AritstaOil - for an oil painting simulation of the Blender result.
ArtistaSketch - for a pencil simulation of the Blender result.
Blender again - to blend pencil version with oil version.
PhotoForge - for an Overlay version.
Blender again - to blend the Overlay version with the previous one to enhance details and contrast of the colors.
Snapseed - to bring out the structure a little more, plus enhancing vibrancy.
FilterStorm Pro - to enlarge the picture canvas.
TouchRetouchHD - for some touchups.
Snapseed again - for the irregular black frame.
A+Signature - for the handwritten copyright watermark.

This is my first picture created on the iPad2... Being much happy with FilterStorm4, Snapseed and Iris on the iPhone4 I was now impatient to test the iPad versions. I was playing around a lot with FilterStorm Pro because I wanted to add more details to the girl's eyes and mouth but in the end I dropped that idea again because I wasn't satisfied with the result. I must say I was quite disappointed about FilterStorm Pro because of it's file management system. This could have been done much simpler. Working with layers is a bit complicated at first but once understood how it works the system offers a lot of possibilities. Of Iris I was also disappointed because of one big flaw: when opening a picture it's automatically being set to a lower resolution of only 2048x1461px (in this case the original resolution was 3156x2236px) and there is no option included to change that - neither in the iPad settings nor are there app settings to switch on maximal resolution support. I wonder what's that's now good for? So if you want to get your loaded picture back to it's original resolution you must adjust Iris to it. However, I did not notice a visible loss of quality after re-adjusting and saving my picture as I tested Iris. Another flaw in Iris on the iPad is the missing landscape mode. I prefer using my iPad in landscape mode for editing pictures.

The original photo for this painted simulation was made in the summer of 1996, I guess it was by the end of July, as my then four years old daughter Anna-Katharina had her first haircut at the same hairdresser who cut my hair for 30 years since he gave me my first haircut, as I was four years old too. I scanned the original photo and optimized it in PhotoShop already a few years ago. Although I always loved PhotoShop I preferred editing my pictures on my iPhone after I discovered the apps for it and now with an iPad2, picture editing is an even greater pleasure.

~~~~~~~~~~~~~~~~~~~~~~~~~~~~~~~~~~~~~~