Showing posts with label ipad. Show all posts

Friday, March 15, 2013

It's snowing again!


Camera App: PureShot

Additional apps used for post processing:
SnapSeed
TouchRetouchHD
SnowDazeHD 
Blender
A+Signature


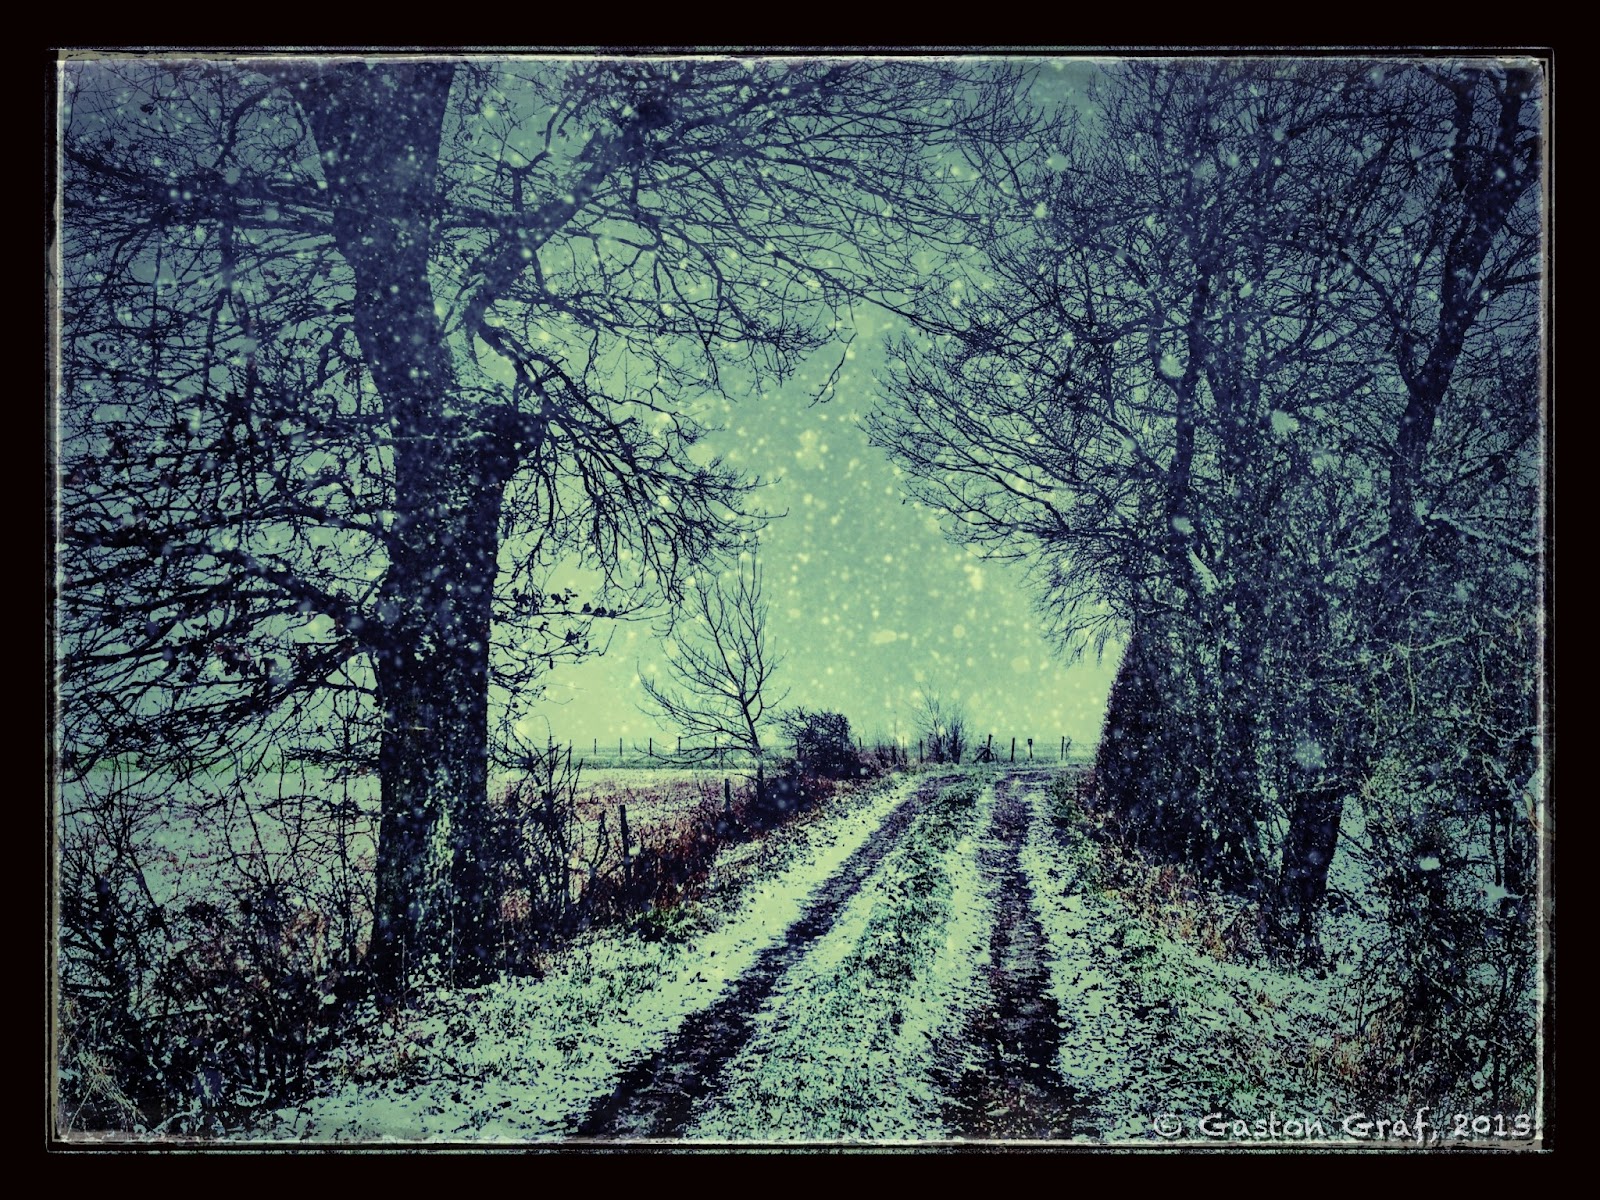
Four days ago it started snowing again as I went out for a walk with our dog. It was snowing for about 24 hours, causing chaos on the roads again. I believed Winter was finally fading away but I was wrong. Winter was striking back at it's worst. 3-8" of snow was enough to raise hell again in Europe. Especially in northern France and Germany many traffic accidents happened, people got injured, people died.... I took the photo for this picture as snow had just started to fall again. Buddy, our dog, loves snow! It's a nice region where we live. From our house it's only a 10min walk to get into the woods. After snowfall finally stopped, the temperatures dropped down to as cold as -17°C (1.4°F) at night. Now Buddy loves it to run around like mad in the meadows, snapping at the snow and rolling in it. So at least some dogs are happy about the snow. I'm not! I hate snow because it makes roads dangerous and prevents me from riding my bike...

I edited the original PureShot photo with SnapSeed, TouchRetouchHD, SnowDazeHD and Blender. The true snow flakes in the photo turned out black in the center of the picture so I removed them with Touch Retouch. Then I added artificial snow in SnowDazeHD. SnowDaze is one of the brilliant apps made by JixiPix. All of their art apps are highly recommended. 


This is the original PureShot photo, a little underexposed because I could only point and shoot as there was a  crazy dog on the other end of the leach that I had to hold. I like the photo nevertheless because it shows the natural light of that moment quite well. 


This was the stage saved in SnapSeed after applying "Ambience" and "Structure" filters. For "Ambience", tap on "Tune Image", touch the screen so the menu appears, and move your finger up to activate "Ambience". I applied the filter at 100%. For "Structure", go to "Details", and choose "Structure" from the menu. You must be careful with this because it will make a noisy picture even noisier but if there's no noise you can usually pull the slider to 100%. "Ambience" in combination with "Details" and/or "Drama" gives a better HDR effect than most HDR apps can do. Before I decided to use SnapSeed for it I also tried iCameraHDR, ProHDR and even Mobile HDR, but none of the results looked as good as the result from SnapSeed did. What is important in this picture are the dark snowflakes. Like an HDR effect enhances noise it also enhances small details but in this case the natural snowflakes didn't look good so I decided to load the picture in TouchRetouchHD to remove them from the center, where they were most visible.


This is the result after removing the snowflakes in TouchRetouchHD. It as a simple task to mask them off with the brush tool.


With the natural snowflakes now gone I was ready to add artificial snowflakes in SnowDazeHD. I created two versions with identical settings with the exception of the snow effect where I used two different settings. Then I was blending both versions in Blender to mix the snowflakes. Settings was Normal blending mode with slider to 65% to let some snowflakes appear a bit more faded than the other which gave the effect a more natural look.


After the snow was added I re-opened the picture in SnapSeed to play around with it. This is a black and white version whee I applied a red filter. I tried other filters too indeed but the red filter looked best. In then I was most happy with vintage effect #9 plus frame #19. If you tap the crossed arrows on a chosen frame, the frame changes. That's a clever way to include more variations for a single frame design. The same applies to any effect where the crossed arrows appear. I did two versions with frame #19 to blend them in Blender because I wanted a more even frame. Blending settings was normal blending mode 50/50 = slider in the middle.


This is the first result from Blender after blending both frame versions to obtain a more even frame.

To create a very unique frame for my picture I flattened my layers by touching and holding my finger in the center of the screen in Blender until the menu appeared to chose the "flatten" option from. The flattened picture then appears down left in Blender. I opened the SnapSeed version with the retro effect but without frame on the right side. Now I painted the mask to let the outer part of the unframed picture shine through the black frame. After applying the mask I adjusted the level of transparency of the black frame by pulling the slider to 65%. Copyright watermark was added in A+Signature.


The finished picture.

--------------------------------------------------------------------------

Thursday, March 14, 2013

The Leaning Tower...


Camera App:
6x7 (for the main picture)
Hipstamatic + Jane lens + C-Type film (for the Hipstamatic print)
                   

Additional Apps used for post processing:
SnapSeed
iCameraHDR
Pixlr Express+
Blender
TitleFX
A+Signature

This is the redneck edition of that famous Leaning Tower, but unlike it's famous brother from Pisa in Italy, this one is located in a tiny village in Luxembourg, where I live. It's a silo. I live in this place now since 19 years and I always wanted to photograph that leaning silo because I believed one day it will collapse, but still it's standing. However, I don't know since when it is standing that way and nobody can say if it will survive the next thunderstorm, or not.
The original photo was made with jag.gr's brilliant app 6x7. I worked it into this b/w picture with SnapSeed, iCameraHDR and Blender. The frame was added in Pixlr Express+ and the copyright watermark was added in TitleFX, which is a new app made by the same team that made already PhotoToaster.
TitleFX is a really cool app to add effects to your letters but it lacks a bit of the comfort A+Signature provides. For instance, in A+Signature you can save your own creations in a catalog but in TitleFX you can't so you'll have to type in your copyright info every time you load a photo. If you want to add the same text to multiple photos it's best to copy it after typing it in the first time and paste it into the other photos.


The Hipstamatic edition was also pimped a bit in SnapSeed. SnapSeed is a must have app if you want to get more out of your photos.

---------------------------------------------------------------------


Sunday, March 10, 2013

On the road again!


Camera App: PureShot

Additional Apps used for post processing:
FrontView: to correct lens distortion.
SnapSeed: to work my photo into a retro style picture.
Blender:: to restore the original size of the picture. After correcting lens distortion I cropped the picture back to it's regular format in SnapSeed. After editing was done I loaded the original photo in Blender on the left side and the edited but cropped version on the right side. Then I pulled the slider to the full right in normal blend mode and I saved my picture. This is a great trick to restore the iPhone's native resolution even if an app doesn't save in maximal resolution or if you had to crop your picture, as in my case.
A+Signature: for the copyright watermark.

Finally, on February the 17th the roads had been dry again and the snow was gone. I felt so happy to ride again! Winter is the hardest time for every biker. All you can do is caressing your bike, doing maintenance and cleaning work while listening to cool Heavy Metal music in your garage, waiting for the white shit called snow to melt away. I HATE snow! Snow belongs to the North and South poles, to Greenland and Alaska, or to the mountains, but it doesn't belong onto roads which it makes dangerous to everybody's life.

________________________________________

Wednesday, August 29, 2012

Doing HDRs with the 645pro (beta)


Camera App: 645pro beta

Other Apps used for post processing:
Mobile HDR - to create a HDR picture from 3 files. Most iOS HDR apps use only 2 files, one overexposed and one underexposed. Mobile HDR aims at creating HDR pictures from your bracket shots made with a DSLR. Because the 645pro currently offers the best picture quality available on the iPhone I wanted to see if Mobile HDR can be useful for photos made with the iPhone too. The answer is YES it can! But to create the files necessary for the HDR picture one must use some tricks because the 645pro offers no bracket mode shooting. So I did the following:
1) I used the 645pro film with the richest colors, which is the FC5 film.
2) I used the Neutral Density #1 filter with 100% efficiency. Currently that filter is only available in the actual beta version of the 645pro but that version is to be released soon. It runs rock stable and comes with a lot of improvements. So if you don't already have the 645pro on your iPhone I recommend you buying it. It's definitely the best camera app available, and it's a pleasure to work with it. 
The 645pro saves your photos in TIFF format as well as in JPG formt. The TIFFs are the RAW files, unprocessed, no film effects, no filters. Development of RAW photos shot with a DSLR is usually done in a so called "RAW converter" but no such app exists for the iOS devices so development is done in the 645pro itself, that's why it's called a dRAW file - a developed RAW file. The JPG file (of the same photo) is the photo with the configured effects applied, such as films and filters used.
3) In case of the old Diesel engine (above) I also created a black and white version in MonoPhix HD as well as an overexposed version in Laminar.
4) To create the HDR picture in Mobile HDR I used the black and white version created in MonoPhix HD, the JPG version from 645pro and the overexposed version made in Laminar. To create the overexposed picture I simply adjusted its curve by pulling it a bit outwards on a spot set in the middle of the line.

Here you see the original photos and the finished HDR picture

Screenshot from Laminar showing the adjusted curve 
to create an overexposed photo.


The black and white picture created from the TIFF file
using MonoPhix HD.


After importing the files into Mobile HDR the processing
 screen looked like this.


Here's yet another HDR picture created in a similar way than the picture on top of the page. In this case I created an underexposed version of the TIFF file to use with the set of 3 photos in Mobile HDR. Then I created a black and white version from the HDR picture in MonoPhix HD. I also tried Snapseed but I liked the result from MonoPhix HD more. Then I was opening the color HDR and the b/w HDR in Blender. The color version on the left side - the b/w version on the right side. Blending mode was "normal", with the slider set 25% to the left. This enhanced the colors and de-saturated the picture a bit at the same time.

As usual, a copyright watermark was added in A+Signature.

If you got questions please feel free to ask. You may also find me on Facebook. Just search for "quaffii" or "Gaston Graf".
~~~~~~~~~~~~~~~~~~~~~~~~~~~~~~~~~~~~~~~~~~~~~~~~~~~~~~~~~~


Monday, August 6, 2012

Summertime...


Camera Apps used: 645pro, BracketMode and Hipstamatic with Jane lens + Ina's 1982 film

Additional Apps used for post processing:

And now I'm in trouble, cause I don't remember all the steps I took to create the pictures on this page, except for the Hipstamatic shots which are left unprocessed. For the rest there was:
iPhoto - for local corrections. I love iPhoto for that feature!
Photo fx Ultra - for color corrections, fog effect and other.
Blender - to blend the different versions to obtain different results, as usual. For instance, I added the frame in Camera Awesome but blended the result with the previous version to reduce the frame effect by 50% because I found it too strong.
Snapseed - very useful for the detail functions, like "structure" which is about the same as the pseudo-HDR function of other apps is. I did two versions, one using SimplyHDR and one with the "structure" function in Snapseed and the outcome was about the same. Also Snapseed is great for creating b/w pictures. The b/w version of the above picture had been created using Snapseed with neutral filter but 25% of grain setting.
Pixlromatic - for various retro filters which I mixed in Blender. Don't remember what combination I kept in the end, I'm sorry.
LensFlareHD - to enhance the sunlight reflections in the chrome on the headlights, the fuel level indicator cap on the gas tank and on top of the rear view mirror. I did not add it to the reflection on the handle bar close to the risers and left it as it is. To place such light reflections precisely, move them in bigger size with two fingers to the destination, then use the controls panel to adjust size, brightness and rotation. After saving your picture, LensFlareHD reduces it a bit from 3264x2448 to 3072x2304 but you can easily get your original resolution back. Load any photo that has original size on the left side in Blender, then load the version you created with LensFlareHD on the right side. Pull the slider all to the right in "normal" blend mode and save your picture. If you check it with apps such as ExifWizardPro or the free PhotoSize you will see that it is back to original resolution.
ProHDR - I did some photo sets with BracketMode but in the end I disliked the outcome of the HDR picture as I put them together in ProHDR so I used only the overexposed version for this photo.
A+Signature - for the usual copyright watermarks. I also use it to mark my Hipstamatic shots with lens/film combo so I don't need to repeat this again and again when posting the photos to various Facebook groups.

The day before yesterday I felt for making some new pics of my bike, especially because it now has the Metzler Me880 Marathon tires mounted and because it had a different derby cover for a while. Usually it wears the Willie G. Skull derby cover but mine had been scratched so I wanted a new one but that one needed some time to arrive so I used the cover with the big bad Nr.1 on it. It's nice, but I like the skull cover much more. Yesterday I finally changed the cover and I made some more pics.

This is the b/w version I created using Snapseed. 
No filter but 25% of grain. I like that!


The photo from yesterday, with the Willie G. Skull derby cover. Photo made with the 645pro camera app. This time I was finally able to snap about a dozen shots before the damn app crashed again. I guess it's having a memory problem. If you close all apps that ran in the background, then reboot your iPhone the 645pro runs fine, until a given moment when it crashes again. And that's when the memory is filled up. I hope the developers will get that problem solved soon.

 Hipstamatic photo with the Bad Nr.1 derby cover

 Hipstamatic photo with the Willie G. Skull derby cover

Hipstamatic photo of the Willie G. Skull derby cover in detail.

~~~~~~~~~~~~~~~~~~~~~~~~~~~~~~~~~~~~~~~~~~~~~~

Sunday, July 15, 2012

Tiny Aliens


Camera Apps: Hipstamatic, CCD,
Extras: Ollo Clip 3in1 Lens System, Macro Lens

Additional Apps used for post processing:
PhotoForge2 - for the usual High Pass versions needed for re-sharpening the photos.
PhotoWizard - for the Emboss effect needed to work out the structure in the main picture. I was blending the embossed version 4x with the previous version in Blender to get the structure effect that you can see in the main picture (top)
Photo fx Ultra - for various enhancements and cropping operations. but especially for the Day for Night effect.
Blender - for many blending operations.
ArtistaSketch HD - for clean sketches of the photos needed to blend in Blender to bring out details in the picture. Pencil sketches are very useful to enhance the outlining in pictures. I usually blend them in either Multiply mode or Overlay mode. You must play around with it and see for yourself what works for your picture. I cannot provide you a basic recipe here. What works for one picture does not necessarily work for another picture as well. That's the experience I made.
TouchRetouch HD - for touch-ups. Strangely there had been some ugly spots left on the drawings created with ArtistaSketch so I removed them before using the sketch version in Blender.
Laminar - for it's great light system used in the picture where the mother plant deploys an egg from one of the cocoons.
iPhoto - for local softening. I love iPhoto for it's "brushes" that can be used locally in pictures. If you want to apply an effect on the whole picture you can choose that option in the brush settings.
LensFlare HD - for the light effects in the blue pictures. Sadly, working with LensFlare is a pain in the ass because it has no undo function which is very annoying to me, but in the end I managed to obtain some useful results nevertheless.
Pixlromatic - for some of the frames.
A+Signature - for the copyright watermarks

Well.... two days ago I looked at one of my wife's flower pots purely by chance which let me discover a beautiful miniature "forest" of some strange little plant I never saw before. So I decided to photograph it. I made over 200 photos, but only few had been really useful. First I shot with the 645pro - the camera app that currently provides you the very best picture quality available on the iPhone. But the 645pro pissed me off once more because it ruined a countless number of really good shots as it crashed again and again. It might provide the best picture quality, but that's useless if the app is crashing that often. So I switched to CCD, which is the other app that saves dRAWs in TIFF format. It's a pure and rather simple camera app without all the fancy camera-simulator-wannabe-pro stuff that comes with the 645pro, but at least it works reliably. It never crashed.


The night scene of that little jungle of alien plants... I really love that miniature world in that flower pot! The night effect had been created with the "Day for Night" effect in Photo fx Ultra. The rays of light had been added with LensFlare HD. The frame was added in Pixlromatic.


Alien Mother deploys an egg from one of the cocoons... Donno what strange little plant that is but isn't it fascinating how it grows in sort of a miniature jungle and how it multiplies itself? Other plants use the wind to distribute their seeds in the world, or use even living animals to carry the seeds to a location far from the mother plant. But this little plant deploys the seeds from cocoons it carries underneath. I only discovered this as I did some shots with the macro lens of the Ollo Clip. Here the iPhone plaid out it's big advantage of being slim and small, compared to other cameras, because there was only little space left in the flower pot to put the camera down enough for shooting from the ant view low over ground. The light effects had been created with Laminar first, then with LensFlare HD.


Hipstamatic shot of the tiny jungle. Combo used was John S lens with Ina's 1982 film


Another Hipstamatic shot made with the Ollo Clip Macro Lens. Combo John S / Ina's 1982.


The original CCD photo used to create the main picture on this page. I cropped it to 1:1 format using Squaready.


The flower pot, where that tiny little alien plant grows... Photo made with CCD, cropped and framed with Pixlromatic.

I'm sorry for not being able to provide you in depth step-by-step instructions about the making of of the pictures on this page but I really plaid around a lot with many different apps until I obtained satisfying results. But don't hesitate to contact me in case you got questions. I'll be happy to assist you with anything you want to know.
~~~~~~~~~~~~~~~~~~~~~~~~~~~~~~~~~~~~~~~~~~~~~~~~~~

Monday, January 16, 2012

Turn of an Era


Camera App: iPhone4S camera in HDR mode.

Apps used for post-processing:
Iris - for cropping
ProHDR - to enhance the original photo further.
Photo Toaster - for the X-Pro effect.
TonaloptiaHD - for a black&white version.
Blender - blending the b/w version with the color version in Overlay mode neatly enhanced colors and contrast. It's a basic procedure I use quite often to enhance photos.
Pixlromantic - this app comes with a great basic bundle of effects but if you want to have them all it becomes more expensive than the legendary Hipstamatic with all of its packages. However, Pixlromatic is absolutely worth the buy. I used it on this picture to give the clouds a more dramatic appearance by using the Bluegrad light filter.
FilterStorm Pro - to de-saturate the picture a bit as well as for adding a vignetting effect. I prefer FilterStorm Pro for vignetting because the effect is well adjustable. Photo Toaster comes with a collection of vignetting effects too but all effects are too intense for my taste. I prefer a subtle transition from edges to center.
Photo Toaster again - for the frame. On the other two photos I used Photo Toaster also for the scratches on the photo of the building entrance. The scratches on the second photo had been added using King Camera because I did not want the same scratches on two different photos. King Camera's advantage is it to allow a combination of up to 3 textures which can all be adjusted separately.
A+ Signature - for the usual copyright watermark.

The sadness continues.... times are changing at the old Railroad Yard in Luxembourg-City. The old buildings have to make room for the new workshops that are urgently needed for maintenance and repairs of modern trains and locomotives. The above picture shows one of the "devastators" feasting on the debris of Roundhouse #1. The building in the background (left) is doomed to be demolished too. The pictures below show the old office building where I reported for service since January 2nd, 1990. I intentionally applied the Cross Process effect on this set of photos because I love it. Although many photo apps come with X-Pro effects, not all are really usable (to me). But I love the effect as it is provided by Photo Toaster.
Tip: If you think an effect is too intense you can change the intensity in an app that supports blending in Normal mode, such as Blender, Iris, PhotoWizard or FilterStorm Pro. Just lay the picture version with the effect over the version without effect in Normal mode. You may then adjust its intensity by moving the slider. It's like making the effect layer more or less translucent, letting the original picture shine through.


~~~~~~~~~~~~~~~~~~~~~~~~~~~~~~~~~~~~~~~~~~~~~~~~

Saturday, January 7, 2012

Awaiting the End


Camera App: Hipstamatic + Lucas AB2 lens + DC film

Additional Apps used for post processing:
TonaloptiaHD - for toning the yellowish original photo down.
Ripped HD - for the ripped out effect.
Blender - to blend the ripped version with the original version in Overlay mode. Then I was blending the result again with the original photo, 50/50 in Normal mode. I did this blending to bring back art of the photo structure.
Pixlromantic - for the frame. There are now a whole lot of great in-app purchases available for Pixlromantic. With all the packages it's sure not one of the cheapest apps but it's worth the money, in my opinion, because it really provides a whole lot of great effects and frames.
FilterStorm Pro - to apply a mask for the yellow of the demolishing machine which is visible in the window because I wanted to give it back a touch of color as an eye catcher.
Perfectly Clear - to enhance the picture.
A+ Signature - for the copyright watermark.

One of the past days I visited the old building we call "Hotel Simon" at Luxembourg Railroad Yard, which is now being emptied. Surrounded by the debris of the previously demolished roundhouse, the demolishing machines are now waiting outside to take on their next victim, which will be this old building. I made this photo of a window at the locker room as the room was being emptied, workers taking out the remaining lockers behind my back. Some lockers hadn't been emptied by their users until deadline so the workers had to cut off the padlocks and empty the lockers themselves. The books at the windowsill sure had been long forgotten as they are old books of locomotives not running anymore.

~~~~~~~~~~~~~~~~~~~~~~~~~~~~~~~~~~~~~~~~~~

Thursday, December 22, 2011

Lest We Forget


Camera: Canon EOS40D with 17-85mm EF USM

Original RAW file developed and cropped with Canon Digital Photo Professional

Apps used for post processing:
1) SimplyHDR - for a HDR version of the photo.
2) ArtistaOil - for a simulated oil painting.
3) Blender - to blend the HDR version with the oil version 50/50. This added some details to the oil version which was important for the crosses in the background.
4) FilterStorm Pro - I imported the Blender result and the HDR version into FilterStorm Pro where I painted a mask to erase the grave cross and the flowers from the oil layer so that it was coming through from the HDR layer.
5) Blender - I blend the FilterStorm result with the result from step 3 again to smooth the edges of the flowers and cross.
6) Photo fx Ultra - to add a glow effect.
7) Blender - to blend the result from step 6 with the result from step 5.
8) Photo fx Ultra again - to add the Depth of Field effect. This nicely blurred the background a bit.
9) TouchRetouch HD - to remove an unwanted lantern pole from the background.
10) Camera+ - to add the nice Vintage border.
11) ArtisataOil again - to create an oil version with the a maximum of bristle depth and canvas effect. I did this because I wanted some texture in the frame.
12) FilterStorm Pro again - I imported the results from steps 10+11 into FilterStorm and painted a mask over the frame to bring the texture out.
13) TouchRetouch - to touch up the inner border of the frame a bit.
14) Crop 'n Frame - to cut the very large frame to smaller size again. I usually prefer the neat little tool Crop Suey for this but it apparently has some problems with large files because it used to crash.
15) A+Signature - for the copyright watermark.


It was on May 4, 2008, as I visited the US Military Cemetery Meuse-Argonne in Romagne in France together with two friends of mine. It's the largest US Military Cemetery in France, if not in Europe, where more than 14,000 men found their final rest. One of them is Sergeant Bernard L. Pohlpeter (photo) who fought with the L Company of the 126th US Army Infantry Regiment, 32nd Division. He got killed in action in the Meuse-Argonne Offensive in October 1918, only one month before the war ended on November the 11th. I did some research about Sergeant Pohlpeter and I found a copy of his regiments history online at this page: The Old Command. His grave is at Plot F, row 12, grave 23.

Although the day of death marked on Sergeant Pohlpeter's cross is October the 12th, 1918, he is listed in his regiments casualties list on page 42 as having been KIA on October the 5th. Reading through the regiment's history I also found no report about combat action of his unit for October the 12th but the unit took heavy casualties in the time from October 4-5. So I now wonder what's the truth is. 

As we walked the beautifully made cemetery in awe and respect, we spoke little because nobody wanted to disturb the silence on that place where so many of those men rest who fought for our freedom. So many graves... so many names... so many individual destinies... It really fills on'e heart with sadness to see so many white crosses on such huge fields.
~~~~~~~~~~~~~~~~~~~~~~~~~~~~~~~~~~~~~~~~

Tuesday, December 13, 2011

Rue de la Concorde (in Arlon, Belgium).


Camera: Canon EOS40D with17-85mm EF USM kit lens

RAW file developed and cropped in Canon Digital Photo Professional.
Apps used for postprocessing on the iPad:

First I created two versions of this picture in Canon's DPP, one slightly overexposed + one slightley underexposed. I saved the files in 16bit JPG format and transferred them to my iPad using PhotoSync. This neat little app is a real must-have for quick and easy picture transfers between iPad+iPhone+Computer. You can send from any iDevice to any other iDevice where the app is running, plus you can send from your iDevice to your Windows PC or Mac. In case you have no WiFi connection, you can do the transfer over a Bluetooth connection. Tip: Alternatively you can use Apple's Camera Connection Kit for iPad (MC531ZM/A) for quick photo transfers from iPhone to iPad. The kit is meant to connect either your digicam, DSLR or SD-Card to the iPad but if you connect your iPhone to it instead, the iPhone is being identified as a camera, allowing to transfer your photos to the iPad.

ProHDR - to create a HDR picture from the two original photos.
SimplyHDR - to enhance the HDR picture further. I was choosing a color overlay with a warm center (brownish, orange) and cold borders (gray). This nicely enhanced the picture but like the center was brownish and orange, also the lantern glasses and the roof of the last house on the picture had been tinted orange, which I didn't like. More about the lanterns later in this listing.
Photo fx Ultra - for a pencil drawing of the first HDR picture made with ProHDR.
Blender - to blend the pencil drawing with the SimpyHDR version. This nicely enhanced the outlines of the buildings. Blending the pictures in Overlay mode keeps the colors but enhances details in the picture.
TonaloptiaHD - for a black and white version of my picture. I switched from MonoPhix to TonalOptia because the developers of MonoPhix dropped color filter support in the HD version. I really have no understanding for that. The HD version appears very unfinished to me. I wrote to the developers but got no response. So their app is history now for me and I'm glad there is Tonaloptia, which includes various color filters plus a train load full of options to fine tune your picture. I was choosing a yellow filter on the b/w picture.
FilterStorm Pro - I noticed the lantern glasses and the roof had been tinted orange too so I opened the color version of my picture in FilterStorm Pro where I added the b/w version of it as a second exposure. Using the masking brush I masked off the lanterns, or to say it in other words, I brushed the b/w lanterns and roof free in the color picture so the b/w parts came trough. But now these parts had been b/w, which still didn't look right.
Blender - I was blending the new version, which had the b/w parts in it, with the color version in Blender, Normal mode, to add a little bit of color again to the b/w parts to let these parts look realistic again.
Photo fx Ultra - to apply a dreamy effect to my picture. I used the SoftFX effect No. 10 for it. This created a very dreamy version of my picture, which was what I wanted to have because I intended to reduce the effect anyway.
Blender - to blend the dreamy version with the non-dreamy version 65/35 in normal mode. Then I was loading this new version in Blender again to blend it with the pencil version which enhanced details a little more. I used only a 12% slider setting in Normal mode, color picture on the left side, pencil drawing on the right side, slider set 12% from the left.
Camera+ - for the beautiful old-fashion paper frame. I just love that frame!

March this year I did a photo walk with a friend in Arlon, a little Belgian town only a few miles from the border with Luxembourg. At that time I still had no clue about iPhoneography so I made my photos mostly with my DSLR camera. The photo that served as the base for this picture didn't even look good enough to me for making something special out of it in PhotoShop. But thanks to the iPad and the wonderful apps that exist I could finally make something out of it that I like. The buildings shown in this picture represent the typical architecture from the end of the 19th century and the first half of the 20th century in Southern Wallonia (also known as "Le Pays de la Gaume), as well as in the Eiffel and Luxembourg.

~~~~~~~~~~~~~~~~~~~~~~~~~~~~~~~~~~~~~~~~~~~~~~~

Saturday, December 10, 2011

Billie


Camera: Canon EOS40D with 17-85mm EF USM kit lens.

RAW file developed in Adobe Camera RAW.
Photo processed on iPad2 with the following apps:

PhotoStudio HD - for a pencil drawing version.
FilterStorm Pro - to add the original photo to the pencil drawing, masking off the horse to keep the pencil effect only on the background. I used FilterStorm Pro for the masking albeit PhotoStudio HD offers the masking tool as well but the precision and zooming for mask painting is way better in FilterStorm Pro than it is in PhotoStudio HD.
Blender - to blend the FilterStorm version with the original photo because I wanted some color in the background.
Camera+ - for the inner Vintage frame.
SP PhotoTada - for the outher frame called Statesman. All other sliders set to "None".
A+Signature - for the copyright watermark as well as for Billie's name.

This is my daughter's Anna-Katharina's beloved Haflinger mare Billie, now 18 years old. She's a wonderful horse with a very gentle character and still as crazy as a filly. Born in Tyrol on February the 9th, 1993, Billie was bought as a young filly by the breeder family Gremling-Dauphin where she got trained in dressage and where my daughter started to learn horse-riding at the age of 6 (Billie was 5 then). At the beginning Anka had her little problems with some of  the training horses. The reason for it certainly was to be found in her still very young age, but as soon as Billie got assigned to her the problems vanished. Billie and Anka made a great team, becoming friends for life. So Billie was assigned to my daughter most of the times she went riding. But in 2002 Billie was about to be sold cause some dude woman wanted to buy her for her daughter... Anka was desperate and sad, fearing to loose her beloved friend forever, so I had to do something. I called the breeder and investigated about that woman and luckily for me the woman was still undecided whether to buy Billie or not so I took the occasion to make the deal right on the spot. I had to give up my dream of flying though, cause the money I spend for Billie was initially meant to pay my PPL A with. But a flying license can always be made - a friend like Billie however, cannot be found a second time in life. She's a member of our family since then, and we all love her dearly.
~~~~~~~~~~~~~~~~~~~~~~~~~~~~~~~~~~~~~~~~~~~~

In the Shadow of a Crumbling Heart


Camera App: Hipstamatic with Loftus lens, DC film, Jolly Rainbo 2x flash (flash physically triggered)


Apps used for postprocessing:
PhotoStudioHD - for a pencil drawing effect.
Blender - to blend the pencil drawing with the original photo which added the structure to the picture. Again I used Blender a lot to create this picture and I don't recall every single step anymore. I also created a version where I applied the Exclusion effect and I used that version again to blend it with the previous one. I created a b/w version in MonoPhix to blend it in too...
Photo fx Ultra - to add a slight Smoque effect which enhanced the light on top and behind of the heart cookie.
TouchRetouchHD - for some minor corrections.
Camera+ - for the Vintage frame as well as for some color enhancement.
Crop Suey - to crop off part of the Vintage frame which was a bit large after my taste.
King Camera - to add frame #12.
A+Signature - for the copyright watermark.

This picture was made after pure intuition as I enjoyed a cup of coffee and some Christmas cookies after yesterday's dinner with my family. My daughter brought the cookies from school where the kids bake them to sell them for a charity cause. There was that heart cookie left and I plaid around with my Hipstamatic and it's new Foodie SnapPak before I finally ate it. I end up with the photo that served as the base to make this picture from it. I had been playing around with quite a bunch of apps until I was satisfied with the result. But that's the fun part in iPhoneography - playing around with apps, testing this and testing that, until one finally get's what one was looking for. Following always the same procedures to create a picture is way too boring ;o).

~~~~~~~~~~~~~~~~~~~~~~~~~~~~~~~~~~~~~~~~~~~~

Sunday, December 4, 2011

First Haircut


Camera: Canon EOS100 with 35-135 USM lens, film unknown,
Year the photo was made: 1996

Apps used for post processing:

MobileMonetHD - for a soft color version of the original photo.
Blender - to blend the original photo with the MobileMonet version.
AritstaOil - for an oil painting simulation of the Blender result.
ArtistaSketch - for a pencil simulation of the Blender result.
Blender again - to blend pencil version with oil version.
PhotoForge - for an Overlay version.
Blender again - to blend the Overlay version with the previous one to enhance details and contrast of the colors.
Snapseed - to bring out the structure a little more, plus enhancing vibrancy.
FilterStorm Pro - to enlarge the picture canvas.
TouchRetouchHD - for some touchups.
Snapseed again - for the irregular black frame.
A+Signature - for the handwritten copyright watermark.

This is my first picture created on the iPad2... Being much happy with FilterStorm4, Snapseed and Iris on the iPhone4 I was now impatient to test the iPad versions. I was playing around a lot with FilterStorm Pro because I wanted to add more details to the girl's eyes and mouth but in the end I dropped that idea again because I wasn't satisfied with the result. I must say I was quite disappointed about FilterStorm Pro because of it's file management system. This could have been done much simpler. Working with layers is a bit complicated at first but once understood how it works the system offers a lot of possibilities. Of Iris I was also disappointed because of one big flaw: when opening a picture it's automatically being set to a lower resolution of only 2048x1461px (in this case the original resolution was 3156x2236px) and there is no option included to change that - neither in the iPad settings nor are there app settings to switch on maximal resolution support. I wonder what's that's now good for? So if you want to get your loaded picture back to it's original resolution you must adjust Iris to it. However, I did not notice a visible loss of quality after re-adjusting and saving my picture as I tested Iris. Another flaw in Iris on the iPad is the missing landscape mode. I prefer using my iPad in landscape mode for editing pictures.

The original photo for this painted simulation was made in the summer of 1996, I guess it was by the end of July, as my then four years old daughter Anna-Katharina had her first haircut at the same hairdresser who cut my hair for 30 years since he gave me my first haircut, as I was four years old too. I scanned the original photo and optimized it in PhotoShop already a few years ago. Although I always loved PhotoShop I preferred editing my pictures on my iPhone after I discovered the apps for it and now with an iPad2, picture editing is an even greater pleasure.

~~~~~~~~~~~~~~~~~~~~~~~~~~~~~~~~~~~~~~


Monday, November 28, 2011

The Beast in my Whiskey Bottle!


Camera App: Hipstamatic with Lucas AB2 lens, Blanko Film, Jolly Rainbo 2x flash (set to 1st position).

Additional Apps used for post processing:
SimplyHDR - for a HDR version of the Hipstamatic photo. That version came out darker than the original photo was.
ProHDR - to make a HDR version from the darker SimplyHDR result + the lighter original photo. Looked really great!
PhotoWizard - this cool app had been mainly used to create this picture. First I applied the FX effect Symmetry X-Axis, then Whirl (slider full right), then X-Axis again. As I turned my iPhone by 180° I looked into the throat of a flaming beast, ready to swallow me - huh. I then turned the picture by 180° in PhotoWizard and saved it. Did some color and contrast adjustments and imported the previously saved picture as a second layer which I blend in Overlay mode. I must say that PhotoWizard offers the same blending options than my beloved Blender app does so if you own already PhotoWizard, Blender isn't necessary.
PhotoWizard - to apply Pattern Border #4. I then discovered some white spots in the black irregular border which had been remains of the white photo border and which I disliked.
Squaready - to crop the picture off the original white Blanko film frame. Saved the result as a 2048x2048 PNG file.
FilterStorm4 - to add a 27% black frame to replace the previous white frame. The reason why I prefer FilterStorm for this operation is that FilterStorm really adds a frame to the edge of a picture. It does not overlay the edge, like most apps do.
PhotoWizard again - now I could apply Pattern Border #4 and I really liked the result.
TouchRetouch - for minor touchups. I removed some white spots from the nose of the beast, which had been remains of light reflections on the liquid to make it look more like a nose.
A+Signature - for the usual copyright watermark.

Yesterday afternoon, the weather being foggy, wet and dirty, I enjoyed a gulp of Jack Daniels Old No.7 Whiskey, which is my preferred brand. Oh yes I know, Whiskey experts will now protest and say the only real good Whiskey is being distilled in Scotland and Ireland, but frankly, it's a matter of taste and albeit I do also love very old Whiskeys made in Scotland and Ireland I love the rather rough taste of good old Jack Daniels Tennessee Whiskey even more. Jack Daniels belongs to Harley riders like the milk belongs to the cow, doesn't it?
Already the beautiful amber color of the tasty liquid is fascinating to look at so I came to the idea to play around a bit with my now almost half empty bottle of  Old No.7 and the iPhone. I made some shots through the bottleneck down to the liquid with the Hipstamatic and I loved the photos. The first ones had been a bit pale so I tried the first notch of the Jolly Rainbo 2x flash which nicely enhanced contrast and colors. I also made some QuickPix shots from the exterior of the bottle, and then I started playing around with apps like TinyPlanets and iDroste, but iDroste kept on crashing all the time when I was applying it's effect so I guess it doesn't like Tennessee Whiskey too much and I continued playing with TinyPlanets and TinyTube, but I didn't like the results too much either.
I finally had big fun trying the various effects included in PhotoWizardSymmetry and Whirl are really cool! After using them I looked into a tunnel (on my picture) and I wondered what else I can do with it until I turned my iPhone upside down and suddenly I gazed into the open mouth of a flaming beast with additional fangs waiting down in it's throat to swallow my poor soul and rip it into pieces.... Holy Cow! Yes there's a beast in every bottle of Whiskey, so beware! If you empty the bottle to make it disappear from it, you'll have it swallowed and then it takes control of you... and... ya know... so... just to give you a warning:

DON'T SWALLOW BOTTLE BEASTS AND DRIVE !!!

Btw: I wrote this blog entry 100% sober and my now about half empty bottle of that good stuff distilled in Lynchburg, TN had not been emptied that much as I made the pictures - I swear! 

Sunday, November 20, 2011

The Beauty of Destruction, part 7 - Old No.3


Camera App: BracketMode

Additional Apps used for processing:
ProHDR - to create a HDR picture from the shots made with BracketMode. Hower, I later discovered the HDR picture being partially unsharp which was the result of too much movement as I made the photos with BracketMode. So I decided to redo my picture, this time using only the darker photo of the set made because it was sharp all over.
SimplyHDR - to enhance the HDR picture created with ProHDR. If you want to create an HDR picture with an app that works with a set of photos make sure you don't saturate too much or your picture will look extremely over-saturated if you load it in yet another HDR app that works with single pictures, such as SimplyHDR. I was already much satisfied with the first result SimplyHDR came up with after loading my picture so I accept it the way it was and saved it.
Grungetastic - to experiment with because my the HDR version looked too boring to me. Testing various settings I finally stuck with Gritty 2 which I adapted to my likes. I pulled almost all sliders back to the left for zero effect except but for the tone slider which I left in its position. But Grunge 1, Grunge 2 and Papers had been set to full left and Borders had been set to No Border.
Blender - to blend my HDR with the Grunge version in Overlay mode, 50/50. Nice result, saved it.
PhotoForge - to create a version with High Pass filter because I wanted to add a little more sharpness. Sharpness could also have been added in Grungetastic but I haven't tested that feature yet.
Blender again - to sharpen my picture by blending it with the High Pass version in Overlay mode, 50/50 settings. Usually 50/50 looks right. To my taste more than 50% is overdoing the effect a bit.
After saving that result I was loading it again in Blender together with the HDR version before applying the Grunge effect because the picture looked a bit too greenish to me. I reduced that effect by setting the slider to 27% only, HDR loaded on the left side, greenish version loaded on the right side. Now I only needed a frame.
Grungetastic - I loaded my picture again in Grungetastic because I wanted a particular frame that I liked. Again I applied the Gritty 2 effect, pulling this time ALL of the sliders to the left, including the Tone slider, but for border I was choosing Border #13 (counted from left to right).
TouchRetouch - for minor touch-up. There had been a bright red little something laying underneath the wheel, disturbing the overall picture a bit so I removed it.
A+Signature - for the copyright watermark.

My latest picture from the "Beauty of Destruction" series shows wheel #3 of the now wrecked old electric locomotive #3609 of the National Railroad Company of Luxembourg, SNCFL. You can still see a number "3" pained in white on the wheel's glide bearing box. Attached to that box was also the speed gauge, a part that transformed the mechanical information received through the revolutions of the axle into electric tension to feed the Hasler-Bern speed indicator with in the cockpit. Also well visible are the wheel rim markings as broad yellow stripes (now bleached after long time weathering). The wheels on this type of engine had not been made in one piece but consisted of a wheel body and a rim that was shrunken onto the body in the workshops. For this purpose, the rim was heated up to a certain temperature because heating metal means the material will expand in its dimensions, hence the inner diameter got bigger and the wheel body could be inserted. Then the completed wheel was slowly cooled down, the rim shrunk again and got fixed in that way to the wheel's body. The reason for this type of railroad wheel simply was cost reduction because it was less expensive to replace a set of rims than replacing a complete axle with full body wheels. But like the advantage of this type of wheel was it to easily shrink a rim onto a wheel body, the disadvantage was that the rim could loosen again especially during a prolonged application of the brakes. Then the cast steel brake pads heated the rim up through friction. In the result the rim was loosening and turning on the wheel body. Under extreme conditions a wheel could be falling apart, with the certainly disastrous result of a heavy derailment of a train. To avoid this, the engineer had to check the markings on the wheel especially when preparing an engine for the day. The greatest railroad disaster as the result of a broken rim was the derailment and crash of the German high speed ICE 844 train "Wilhelm Conrad Röntgen" in 1998. The link goes to a video report on YouTube taken from a German TV documentation. I added this one because I couldn't find a suitable English report. But even if you don't understand German, the pictures show it all. In case of the ICE884 the train did not derail because a rim was overheating but because there had been fissures in it which had not been discovered due to technical inspections not being made.

Wednesday, November 16, 2011

The Beauty of Destruction, part 4


Camera App: BracketMode

Additional Apps used for post processing:
ProHDR - to create a HDR picture from the photos made with BracketMode.
SimplyHDR - to enhance that HDR picture further.
PhotoWizard - to create a nice Crayon version of the HDR picture.
Blender - to blend crayon with HDR 50/50 in Normal mode.
Pixlromantic - for the frame called Sand and a b/w effect called Tom. I saved both versions, color+Sand and Tom+Sand, then I blend both in Blender to reduce color saturation a bit.
PhotoForge2 - for a High Pass effect.
Blender - to blend High Pass with the Pixlromantic version 50/50 in Overlay mode to enhance sharpness.
FilterStorm3 - to apply a mask because I wanted more sharpness only on the molten and burned steel surface.
TouchRetouch - for some minor corrections. There had been a few drops of burned steel that appeared just as white spots in the background so I removed them.
A+Signature - for the copyright watermark

Old electric locomotive #3609 is laying in pieces, her body brutally ripped apart by the claws of a huge wrecking machine; her entrails cut apart by a cutting torch.... This had been a part of her braking system. The part in the background is one of the brake blocks, which had been made of cast steel.

In previous posts I described how to use a Pencil version of your picture made in Photo fx to blend it with the normal version in Blender to receive a nice outlining effect. I now discovered an even better solution because PhotoWizard includes a really beautiful Crayon filter that gives you a beautiful picture you can either use as it is or use it to blend it in Blender. But PhotoWizard has much more to offer than just that. Another app that I recommend because of its nice filters and frames is Pixlromantic.

Below is the Instagram version of this picture. Additionally to the effects described above I used the Sophia effect which gave the picture a blueish tint on the burned steel. Also I did not sharpen the burned steel surface but I did not apply one of the typical Instagram filters either cause I did not like any of them on this picture.


~~~~~~~~~~~~~~~~~~~~~~~~~~~~~~~~~~~~~~~~~~~~~~~~~~~~

Wednesday, November 2, 2011

Angels On My Wall...


Camera App: regular iPhone4 camera app with HDR switched on.


Additional Apps used for post processing:


Well, I've got to to confess that I did not keep records on the exact steps I took to make this picture of two metal cast angels hanging on our kitchen wall. But included was:


SimplyHDR - to create an enhanced HDR picture from the original HDR photo.
Artista Sketch - for a pencil drawing of that picture.
Blender - again one of my most important apps plaid a major role in this creation. I used it a lot to blend different versions of my picture until I was finally satisfied with the result.
Super Retro - for an effect called Middle Earth. This gave the photo a burned look with nice colors.
PhotoStudio - for a burned paper effect.
FilterStorm - for many steps... First one was to apply a radiant gradient filter, starting from the middle and going to the far right, as far as the left wing of the male angel goes. This gave a very nice effect. To do this I imported the version I saved before applying the burned paper effect to the layer with the burned paper effect I opened in FilterStorm. After applying the gradient filter I imported the version before the burned paper effect again. This time I applied a mask over the angels to cut them from the streaky gradient effect.
PicGrunger - for the Burlap texture.
SP PhotoTrade - for the beautiful Steam Punk frame and Journal texture. I must say I'm very happy about the will of the app developers to listen to us users because as the app came out it only supported low res savings. The argument of the developers was that processing on the iPhone would take too much time for high res pictures and they feared the main steam of customers wouldn't be willing to wait that long. Luckily I could convince them to include high res saving with a warning that this may take some time to process. But I wonder what they really understand as "high resolution" because still the picture wasn't saved in full iP4 resolution of 2592x1936. I was only 2300somethingXanything which I found out by checking the picture size with the neat little app called PhotoSize.
Iris - to resample the downsized picture back to 2592x1936 pixels. Although other apps may do the same job I still prefer Iris for this because there is no loss of quality. I recently did some pics for friends of mine who provided them in 640x480 and boosted the final version to 2592x1936 which looked brilliant then. So Iris is first choice for boosting resolution.
FilterStorm again - this time for erasing the Journal texture from the angels. To do this I first created two different versions in SP PhotoTrade, one with the frame an no texture, using the version before PicGrunger, and one with the frame+Journal texture using the PicGrunger version for it. I then imported one version to the other as a second exposure in FilterStorm to erase the Journal texture from the angels only. 
SnapSeed - to change white balance to a blueish look. The original angels have the look of oxidized bronze which I wanted to get back. The blueish tint was only the first step to achive this.
Blender - as I said I used it again and again to blend a lot. I don't remember the different steps in detail but I sure used it to blend the blue tinted version with the normal version.
FilterStorm - again I used it to erase the blueish angels from the brown tinted version so the angels stood out from the background. But I still wasn't satisfied because the angles looked too blue.
Blender - I was then blending the blueish angel version with the normal version again and I finally got want I was looking for.
A+Signature - for the copyright watermark...
After transferring my pictures to my laptop computer I saw on the big screen that it looked much too pale for my taste so I used Camera+ to enhance Vibrancy by 46%. 


I was big fun to make this picture. Hope anybody else likes it too. Below is the original photo I started from to make it. The angels are hanging on our kitchen wall. I photographed them using the iPhone camera app and the kitchen light only. No tripod either.


~~~~~~~~~~~~~~~~~~~~~~~~~~~~~~~~~~

Wednesday, October 5, 2011

How to simulate a hand colored black and white photograph on the iPhone


Camera App: Hipstamatic with Lucas AB2 lens and with Ina's 1935 film

In my second "How to" I now want to show you how to simulate a hand colored black and white photograph like those popular before the invention of the color negative film. The idea came to me last Sunday as there was Father's Day here in Luxembourg. My daughter gave me a wonderful book about photography. It's German title is "In 1000 Bildern um die Welt - faszinierende Fotografien aus den Jahren 1850-1910" (translates as "In 1000 pictures around the world - fascinating photographs from the years 1850-1910"). Already the cover shows a beautifully hand colored photo from the past plus there are a lot more of them inside of the book. I noticed that some of those photos had been fully colored while others had only been partially colored. I don't know if this was a matter of costs but it sounds somewhat logical to me that it was less expensive to color only the main subjects in a photograph rather than the whole picture.

Last week I had been in Luxembourg City and a guard was finally to be seen at the Palace of the Grand-Duke again. I'm not sure about this but like the guards aren't always present the conclusion lies near they are only on duty when His Grand-Ducal Highness is actually in the building. So I made a few photos of the guy standing on guard.

My first step was it to create a color pseudo HDR picture in SimplyHDR. Settings: High Dynamic Range tap > HDR Grain 01.


Then I used DramaticB&W to create a pseudo HDR picture in b&w. Settings: DramaticB&W tap > Dramatic 1. I decided to choose Dramatic 1 preset because it nicely enhances the details in the picture. Even if this appeared to be a bit overdone at the first look it will be reduced later when applying a dreamy effect.


I used FilterStorm3 to apply a mask over the parts in the picture that I wanted to color. To do this I opened the color HDR first, then added the b&w HDR as a second exposure. I carefully painted a mask over the parts to be colored. It's a bit tricky but not impossible to do that on the tiny iPhone screen. But you need to be careful not to accidentally touch the [x]-button that cancels the operation or your whole work will be lost. It happened to me as I was already very close to finish the mask. Brush thickness is relative to zoom factor. This means the farer you zoom in, the finer the brush becomes even if you did not change its size which allows to paint a very precise mask. Painting the mask is a lot of switching between the hand tool (cross) to move the picture around, and the brush tool, as well as a lot of zooming in and out, so the danger is always present to accidentally hit the cancel button. If you're tapping too quickly on the place where your are painting the app takes this as a double tap and zooms out automatically which can be very annoying sometimes. 


Painting the mask

Clicking the finish mark processes the operation and the result is a dramatically detailed picture with parts of it in color. But this is still far from the old hand colored photographs that had been so popular before the invention of the color film as you can see on the result below:


After applying and processing the mask

At this point there had been still some flaws in the picture to be corrected. Please note the colored part of the sentry box base that is in the shadow of the sentry box. I colored it but that was wrong. Also the left edge of the sentry box looks way too saturated plus there is part of an unwanted object on the lower edge of the picture, in front of the guard's right foot and the original frame of the Hipstamatic Ina's 1935 film also doesn't look good anymore. Now how to correct this?

The easiest way to correct the color problems was it to load the picture again in FilterStorm3, adding the b&w HDR version as a second exposure, applying a mask to it - et voilĂ , the color had been removed.

The bigger problem was it to remove that unwanted object on the lower edge. For such purpose the app TouchRetouch is best choice. I opened the picture and applied a mask to the object I wanted to remove:

unmasked

masked

gone


After tapping the Remove tool (3rd from right) the object was gone, but then I faced a problem I found myself unable to correct. As you can see, the gap line between the tiles where the guard stands had also been interrupted. On a big screen using PhotoShop or any other software with a clone tool on board one can easily fix this, but on the tiny iPhone screen the menue bars always came in my way when I tapped the stamp tool. So I decided to leave this as it was and hoped it will later be hidden by a frame anyway.

Correcting the frame was easy. I cropped the picture from the old frame in FilterStorm3 and resized it back to 1936x1936px, then I opened it in PhotoForge2 to add a white frame (Frame 2).

My goal was it to find a way to reproduce the look of an old hand colored photograph as realistic as possible but at this stage my picture still looked far from what I wanted to achieve. So I loaded it into Romantic to create a dreamy effect. The setting used was Dreamy Photo > Dreamy Strong. I pulled the slider back to about 25% because the effect looked a bit overdone.

To give it an aged touch I opened that result in PicGrunger where I used the following settings: Style > Gig; Strength > 0; Border > none; Texture > original. The outcome of this looked great, but to my taste it was a bit too saturated. But that problem could easily be solved. I was loading the version that I saved before using PicGrunger plus the version after PicGrunger both into Blender and blend it in normal mode with 50% slider setting. The resulting image finally was what I wanted to get. As usual I added my copyright watermark in A+Signature.

It was big fun making this picture and I'm quite happy with the outcome of it but there may be better methods to simulate a hand colored old photograph so the search and experimenting goes on.